10 Spring “Freshening” Mistakes That Make Your House Look Dusty
Spring cleaning is meant to make your rooms feel lighter, brighter, and clearer, yet a few small missteps can leave every surface looking as if it is still coated in powder. When you focus only on what is in front of your eyes and skip the hidden dust traps, you end up redistributing particles instead of removing them. By spotting the most common “freshening” mistakes before you pick up a cloth, you give your home a real reset instead of a quick cosmetic touch up.
The habits that keep your space looking truly clean are rarely dramatic, but they are very specific: the order in which you clean, the tools you reach for, and even how you handle clutter all affect how much dust sticks around. Once you understand where dust actually comes from and where it hides, you can tweak your routine so that each spring session cuts down on buildup instead of stirring it back into the air.
1. Starting Without a Dust Strategy
Beginning spring cleaning by randomly wiping whatever catches your eye lets gravity work against you and virtually guarantees that freshly polished surfaces look hazy again within hours. You need a plan that moves from the highest points in a room down to the floor so you are always chasing dust in a single direction rather than chasing your tail. Professional cleaners describe this as a “top to bottom” approach because any particles knocked loose from shelves, frames, or vents will eventually land where your vacuum or mop can collect them.
Several guides to spring cleaning mistakes warn that “starting without a plan of attack” wastes energy and leaves rooms looking half finished. Heating and cooling specialists also point out that when you follow the Golden Rules of from ceiling to floor, you give your vacuum a chance to capture the particles that settle at the end instead of letting them linger on baseboards and carpets. Sketching a quick checklist for each room before you start also makes you far less likely to skip the out of reach spots that quietly feed that dusty look.
2. Ignoring Ceilings, Corners, and High Fixtures
Focusing only on counters and coffee tables means you miss some of the biggest dust reservoirs in your home. Ceilings, the tops of walls, and high corners collect cobwebs and fine particles that slowly drift down and dull everything below. Fan blades, crown molding, and the upper edges of window frames often sit untouched from one season to the next, so every time you open a window or switch on a fan you shake loose a fresh layer of grime.
Indoor air experts highlight that dust tends to accumulate on ceilings and corners, baseboards, fan blades, lamps and lampshades, window blinds, and even the junctions where floors and walls meet. Home maintenance advice on common cleaning errors singles out Not Looking Up as a classic reason your home still looks dingy after a long day of work. If you start each room by dusting ceiling fans, light fixtures, and high shelves with a microfiber wand, then move down to eye level and finally to floors, you strip away the haze that makes everything feel slightly gray.
3. Treating Dusting as the Last Step
It may feel logical to vacuum, mop, and then do a final quick dust, but that sequence quietly sabotages your results. When you wipe furniture and decor after you have already cleaned the floors, you knock particles back into the air so they can drift down again and settle on just mopped surfaces. That is one reason your rooms can look freshly cleaned in the morning and strangely dull by late afternoon.
Cleaning specialists who focus on air quality recommend that you dust first, working from the top of the room down, then vacuum or mop so that your tools collect what you have dislodged. Advice on why your home often calls out “Dusting From The Bottom Up” and “Dusting After You Vacuum” as key missteps that undo your effort. When you flip the order and treat dusting as the opening move instead of the finishing touch, your spring routine actually removes dust instead of chasing it from one surface to another.
4. Relying on Feather Dusters and Dry Cloths
Feather dusters and old T shirts feel quick and convenient, but they tend to push dust around rather than capture it. The light bristles and flat cotton fibers scrape particles off one object and flick them into the air, where they can resettle on nearby furniture. That is why your “clean” living room can still look slightly cloudy in direct sunlight, with fine lint visible on glass, screens, and dark wood.
Guides to common dusting errors point out that Using A Feather is one of the fastest ways to redistribute, not remove, debris. Professional cleaners instead recommend microfiber cloths that use a static charge to grab and hold particles, a tip echoed in advice that encourages you to dust with microfiber instead of paper towels. If you lightly dampen the cloth for hard surfaces, then rinse it frequently, you trap dust instead of leaving a fine film that makes your home look perpetually smudged.
5. Dusting Around Clutter Instead of Clearing It
When you are tired or rushed, it is tempting to swipe around stacks of mail, framed photos, or the row of spice jars on the counter. That shortcut leaves untouched surfaces where dust can collect in thick lines and patches, which are especially visible when sunlight hits from the side. Over time, those outlines make shelves and tabletops look grimy even if you think you dust regularly.
Home cleaning pros describe Decluttering Before Cleaning as one of the most frequent mistakes that keeps rooms looking messy. Indoor air quality advice also notes that minimizing clutter reduces the number of surfaces where particles can settle, which directly leads to lower dust levels. Taking an extra minute to move everything off a shelf or nightstand, wipe the full surface, then dust each item before putting it back cuts off one of the main reasons your spring “freshening” never quite looks crisp.
6. Forgetting Soft Surfaces and Fabric Filters
Even if your wood furniture gleams, neglected textiles can make a room feel stale and dusty. Carpets, rugs, upholstery, and curtains act like giant filters that trap skin flakes, pet dander, and outdoor grit, then release them back into the air every time you walk or sit. If you skip deep vacuuming or rarely wash these fabrics, your home can look hazy no matter how often you wipe hard surfaces.
Guides that explain what causes a in your house point to textiles, foot traffic, and open windows that carry in particles from outside. A detailed breakdown of Why Is My recommends increasing your vacuuming schedule and using machines with good filtration so you are not simply blowing fine dust back into the room. When you treat rugs, sofas, and drapes as core parts of your spring routine, not afterthoughts, you strip out a huge hidden source of the haze that makes your space look less clean than it is.
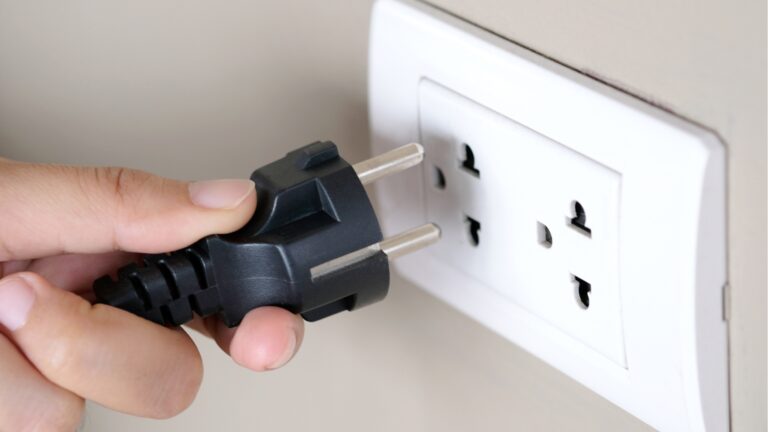
7. Neglecting Vents, Filters, and Air Movement
You can wipe every surface in sight, but if your air system is dirty you will keep fighting the same gray film. Clogged HVAC filters, dusty vents, and neglected return grilles recirculate particles every time your system runs. That constant movement keeps dust floating, so it settles quickly on freshly cleaned furniture and floors.
Indoor air quality specialists stress the need to improve indoor air by changing HVAC filters on schedule, since a clogged filter spreads dust across the home instead of trapping it. The same source explains that when you change HVAC filters on schedule, you significantly cut the amount of dust that can circulate. Plumbing and air service experts who answer the question Why Is My also recommend sealing gaps around doors and windows so unfiltered outdoor dust does not constantly blow into your home. If you make vent covers, exhaust fans, and filters part of your spring checklist, your rooms stay clearer for longer instead of clouding up again within days.
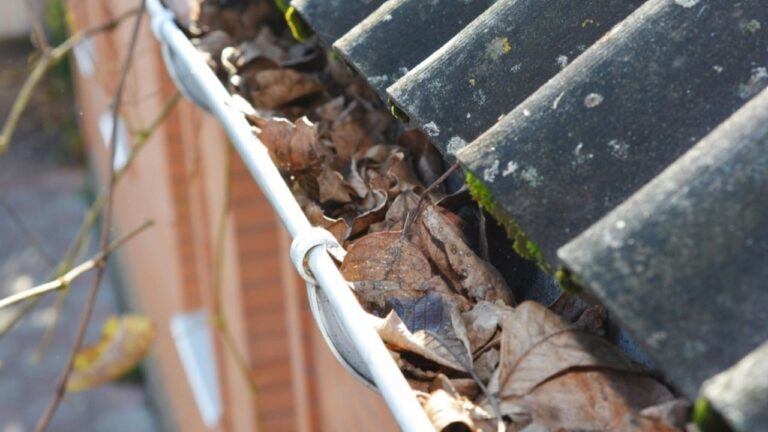
8. Skipping Windows, Blinds, and Light Sources
Smudged glass, dusty blinds, and grimy lampshades can make an otherwise tidy room feel dull. When light has to pass through a film of dust, you lose the sharpness and sparkle that signal “clean” to your eye. Blinds and shades also act as horizontal dust shelves, so every slat that you skip contributes to the overall haze.
Air quality guidance on where dust accumulates specifically lists window blinds and lamps as spots that are often overlooked. Cleaning checklists that warn about Common Spring cleaning also mention that people tend to focus on floors and counters while ignoring window ledges and light fixtures. Taking time to vacuum or wipe blinds, wash or replace tired curtains, and dust lampshades and bulbs while they are cool lets natural and artificial light show off the work you have done instead of highlighting streaks and specks.
9. Treating Spring as a Once a Year Reset
Even the most thorough spring cleaning will not keep your home looking clear if you treat it as a one time event. Dust is a constant mix of fibers, skin cells, pollen, and outdoor grit, and it starts to settle again the moment you finish wiping. If you wait another year before tackling the same tasks, you face thick buildup that is harder to remove and far more visible.
Housekeeping guides that explain why your house emphasize poor ventilation, clutter, and infrequent cleaning as key reasons dust seems to win. The detailed breakdown of The Complete Guide to reducing dust recommends a regular cleaning schedule, including weekly vacuuming and periodic deep cleaning, instead of relying on one big seasonal push. If you treat spring as the moment to reset your habits, set reminders to change filters, and establish a simple weekly dusting and decluttering routine, your home will look freshly cleaned for far longer than a single weekend.
Like Fix It Homestead’s content? Be sure to follow us.
Here’s more from us:
- I made Joanna Gaines’s Friendsgiving casserole and here is what I would keep
- Pump Shotguns That Jam the Moment You Actually Need Them
- The First 5 Things Guests Notice About Your Living Room at Christmas
- What Caliber Works Best for Groundhogs, Armadillos, and Other Digging Pests?
- Rifles worth keeping by the back door on any rural property
*This article was developed with AI-powered tools and has been carefully reviewed by our editors.