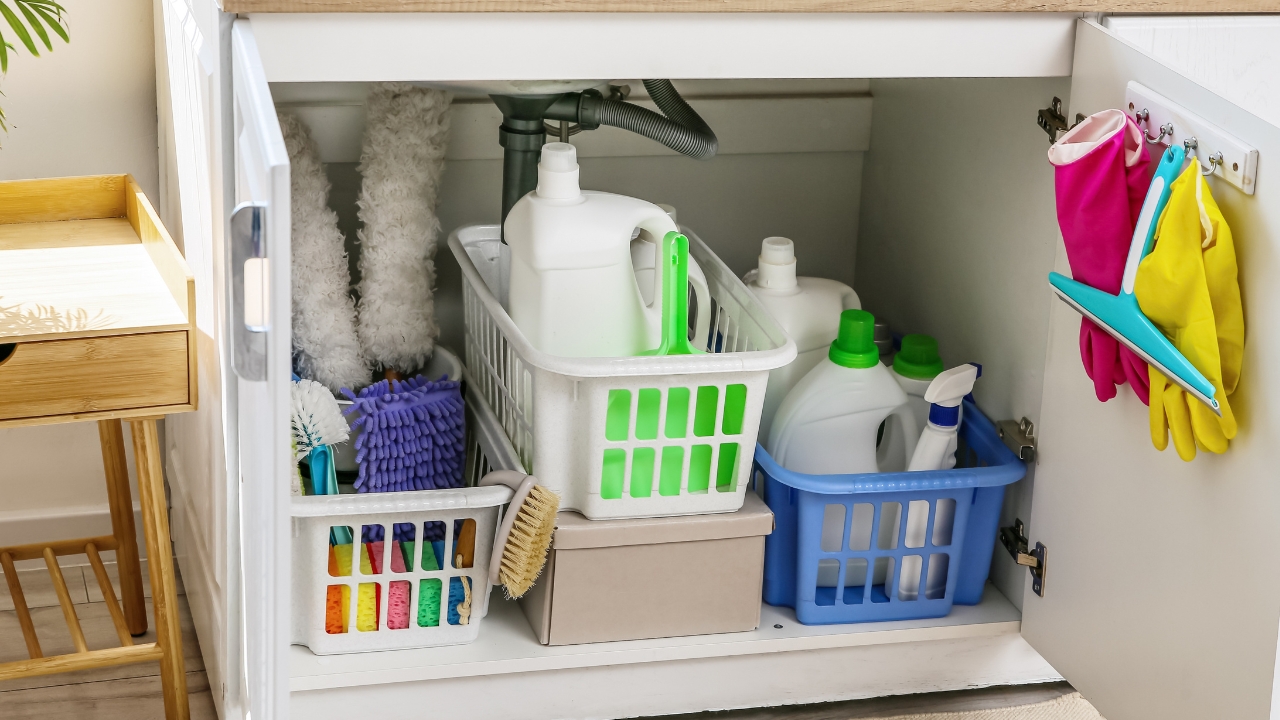
How to pick under sink bins that actually fit cleaning bottles
Photo credit: Pixel-Shot/Shutterstock.com
Under-sink space is tricky—there’s a trap to dodge, a valve to work around, and a door swing that steals inches. The goal isn’t perfection; it’s a setup that makes grabbing the glass cleaner as easy as closing the door. I focus on shallow, slide-out pieces that clear plumbing and keep bottles upright so nothing tips over and leaks.
Measure the obstacles, not just the cabinet
Before you buy anything, measure width, depth, and—this is the big one—clear height under the P-trap. That curve is why tall caddies fail. Note how far the supply lines and disposal protrude so you can leave a clean lane for them.
Sketch the interior and mark “no-go” zones. When you shop, you’ll look for bins that sit beside, not under, the trap. That little bit of planning saves you from returns and a stack of organizers that almost fit.
Choose low, wide bins instead of tall towers
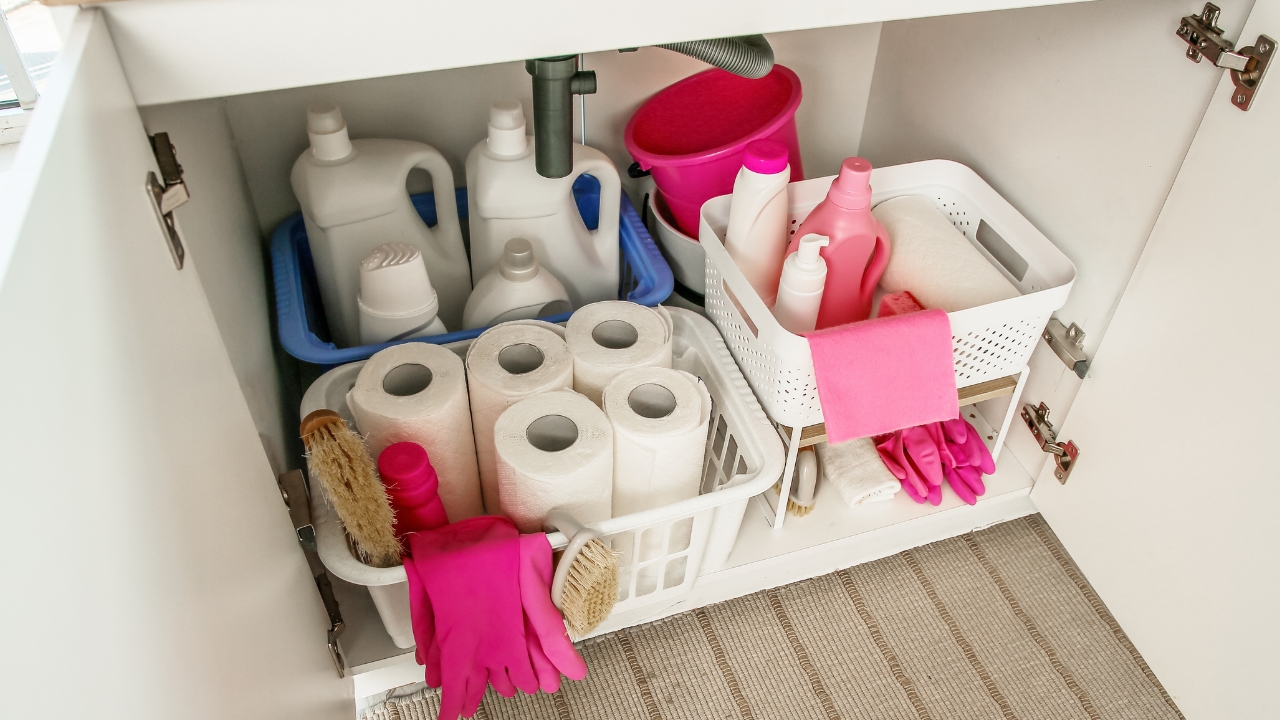
Shallow, wide bins keep labels visible and stop the domino effect. Look for 4–6″ tall sides so standard spray bottles sit snugly without hitting the shelf above.
Group by job—glass, surfaces, floors—so you can pull one bin and have a whole task in hand. One trip in, one trip out. That’s the routine that sticks on busy days.
Add a slide-out to the easiest side
If plumbing hogs the left, put a single slide-out on the right. A steel or heavy plastic frame with soft-glide rails turns a deep cabinet into a drawer.
Leave a finger-width gap behind the bin so hoses and wires aren’t pinched when you push it in. Smooth slides are the difference between “love this” and “why did we do this.”
Park sponges and brushes up, not down
Use a short, adhesive bin on the inside wall for scrubbers and gloves. They’ll dry faster and stop dripping on the shelf.
If door space allows, add a slim pocket for dishwasher pods or magic erasers. The small things that get lost become the easiest to grab—which is the whole point.
Corral rags and keep the clean ones obvious

A soft bin or fabric cube at the front right holds clean microfiber cloths; a second, labeled “dirty,” goes at the back. When one fills, it’s a laundry cue without thinking.
Roll cloths into thirds so they stand like little files. It takes seconds and makes inventory obvious—no more digging under bottles for a clean rag.
Use the ceiling for wrap and liners
Tension rods mounted high across the cabinet make a bar for hanging bottle sprayers or a roll of trash bags. The vertical layer frees the shelf for heavier items.
If you use liners, clip the edge of the roll to the rod with a binder clip so it doesn’t unravel. One pull, one clean tear, done.
Label simply so the system survives real life
A small label—“glass,” “disinfect,” “floors,” “rags”—on the bin front keeps everyone putting things back in the same spot. Handmade labels are fine; the consistency is what matters.
When you know where things live, you stop buying duplicates. That little habit pays for the organizers in a month.
Like Fix It Homestead’s content? Be sure to follow us.
- Man Says He Found Out the Fence He Paid For Wasn’t Actually on His Property
- Woman Says Her Neighbor Started Taking Mulch From Her Delivery Pile Before She Could Even Spread It
- I made Joanna Gaines’s Friendsgiving casserole and here is what I would keep
- What Caliber Works Best for Groundhogs, Armadillos, and Other Digging Pests?