The outage routine that keeps pipes safer without leaving every faucet dripping
Photo credit: Oleksandr Khokhlyuk/Shutterstock.com
When the power cuts out on a subfreezing night, you do not have to choose between a sky‑high water bill and a flooded crawl space. A smarter routine can keep your plumbing safer by using targeted drips, insulation, and a few strategic habits instead of leaving every faucet in the house running. The goal is to manage pressure, protect the most vulnerable lines, and ride out the outage with your pipes and budget intact.
Why outages turn cold pipes into a real emergency
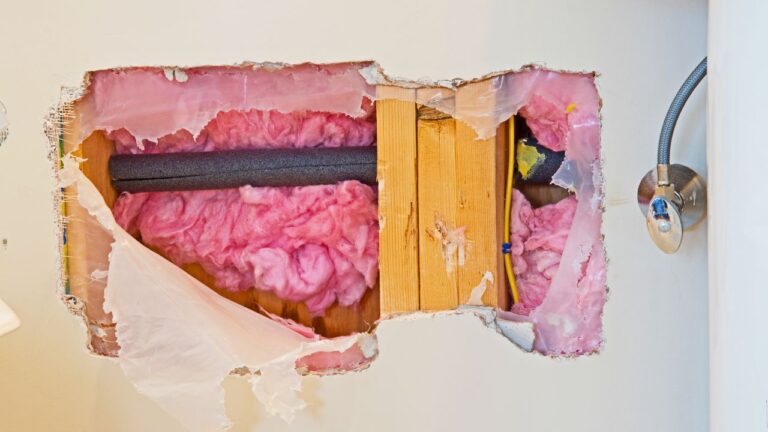
Once your heat shuts off, the temperature inside walls, crawl spaces, and unheated rooms can fall quickly, even if the main living area still feels tolerable. Water in those hidden runs of pipe starts to cool, expand, and build pressure, which is why frozen plumbing so often shows up as a burst behind drywall or under a slab rather than at the sink you can see. Guidance that highlights Simple, low‑cost actions now makes the point that basements, attics, washing machines, and crawl spaces are exactly where trouble tends to start when the mercury drops.
The physics are unforgiving, but they are predictable enough that you can plan around them. As water freezes inside a pipe, it expands and can block flow, which spikes pressure between the ice plug and the nearest closed valve. That is why experts stress that Remove, drain, and store hoses, then Close interior shutoffs and Open the outside hose bibs before a hard freeze, so trapped water has somewhere to go instead of rupturing copper or PVC. A power outage simply accelerates that risk because your furnace is no longer buying you time.
The case for a targeted drip, not a house‑wide trickle
Letting every tap run all night is the blunt‑force approach to winter plumbing, and it is rarely necessary. You get more protection, and waste less water, by focusing on the fixtures that sit on exterior walls or feed unheated spaces. Municipal guidance that tells residents to only drip where pipes are along an exterior‑facing wall captures the idea: you are not trying to turn your plumbing into a fountain, you are trying to relieve pressure in the lines most likely to freeze.
That is where the science behind Key Takeaways on winter plumbing comes in. A slow drip keeps water moving just enough to reduce the chance of ice forming and helps manage pressure in the system so a small freeze does not turn into a catastrophic break. When you combine that controlled trickle with steps like preventing cold air from entering under sinks or through foundation vents that could contribute to pipe freezing, you get more safety from a fraction of the water you would waste by opening every faucet in the house.
How to build an outage‑ready routine before the lights go out
The best outage routine starts long before the forecast mentions ice. You protect yourself by hardening the weak spots in your plumbing so that when the power fails, you are not scrambling in the dark. That means using Essential Steps to Winterize Your Plumbing, such as adding foam sleeves to Insulate Vulnerable Pipes and keeping your thermostat no lower than 55 °F so interior runs never flirt with freezing.
Outdoors, you reduce your exposure by tackling Pre‑Winter Drainin on hose bibs and, where possible, upgrading to a frost‑free hose bib that you install and remove each year. Indoors, you follow utility advice that Settings matter, because Many people welcome crisp winter weather but not the pipe‑related headaches that come with it. By the time a storm is on the radar, your routine should be as simple as opening a few cabinets, setting a couple of drips, and confirming that vulnerable lines are insulated.
What to do in the first hour of a winter power outage
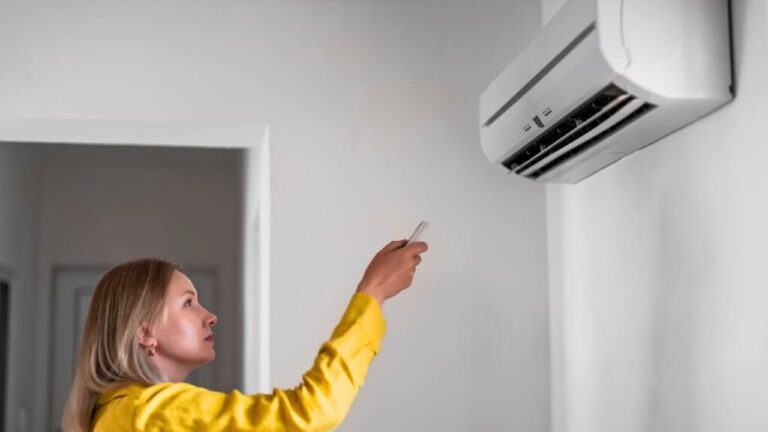
When the power actually fails, your first move is to preserve whatever heat you have and direct it toward your plumbing. Guidance framed as Restore Heat and If You Can underscores that the fastest way to protect pipes is to get your system running again. Once your home starts warming back up, the risk of freezing drops sharply, so checking breakers, fuel levels, or backup heat sources should be near the top of your list.
If the outage is clearly not a quick blip, you pivot to your no‑power routine. That is where advice that tells you to Set Faucets to a slow drip on vulnerable lines becomes critical, especially in bathrooms or kitchens on exterior walls. At the same time, you can add extra protection by slipping on special insulating sleeves or even using other sources as DIY insulation, such as towels or blankets, around exposed pipes in basements and crawl spaces so they lose heat more slowly while the power is out.
How to choose which faucets to drip, and how much
Not every tap deserves a drip, even in a deep freeze. You get the most benefit by prioritizing the runs that are both hard to access and most exposed to cold, such as sinks over garages, laundry hookups in unheated rooms, and bathrooms on the north side of the house. Detailed guidance on When and Which Faucets to Drip stresses that you should focus on the fixtures that sit at the ends of long runs or that have a history of freezing, because protecting those points lowers the risk of frozen pipes significantly across the system.
The flow rate matters too. You are aiming for a steady drip or pencil‑thin stream, not a half‑open faucet that drains your well or spikes your bill. Plumbing pros who spell out How to Drip Faucets in Winter as part of Best Practices to prevent Frozen Pipes emphasize that you should pair that small flow with Key Takeaways like insulating exposed pipes so they are safeguarded from extreme weather conditions. The combination of movement and insulation is what lets you keep the drip modest instead of running water full‑tilt.
Insulation, cabinets, and outdoor fixtures: the quiet workhorses
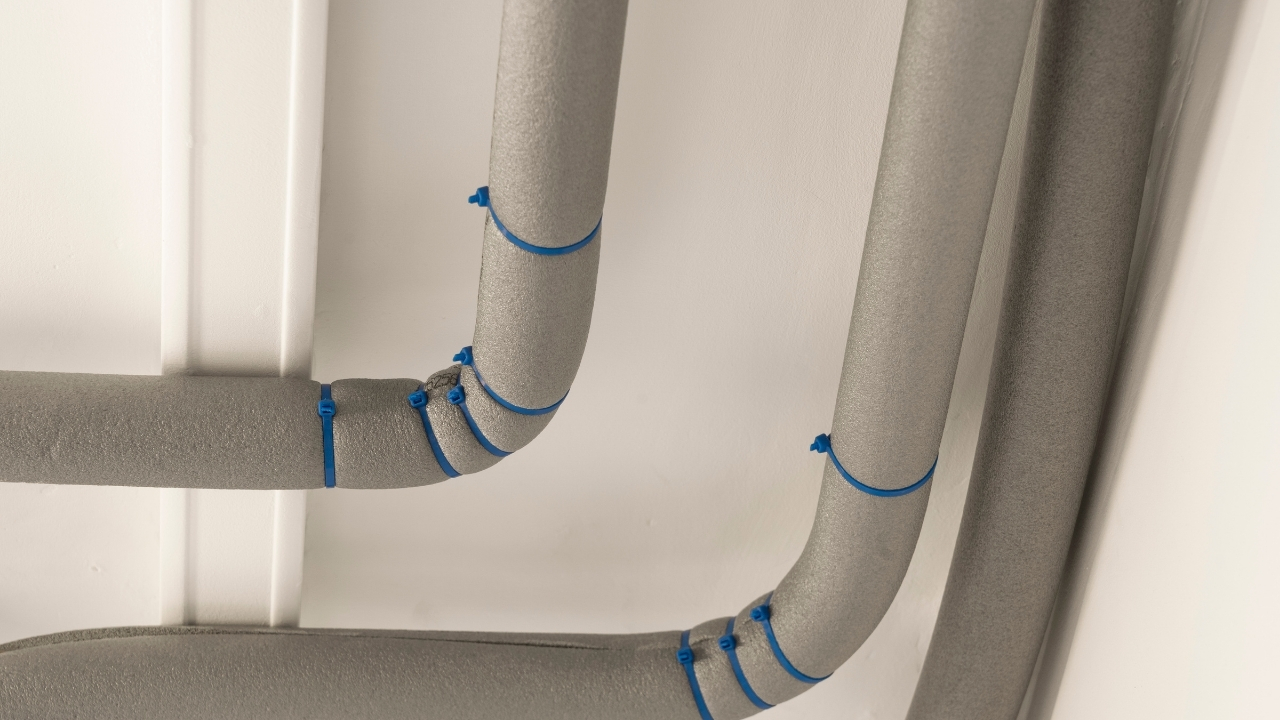
A good outage routine leans heavily on passive defenses that keep working even when you are asleep or away. Indoors, that starts with pipe insulation, which is repeatedly described as a first line of defense. Advice on How to Insulate your Pipe runs points out that a small investment in foam sleeves is cheap compared with repair costs, and that simply opening cabinet doors lets warm room air reach pipes under sinks. Those steps keep water lines closer to room temperature, which buys you precious hours if the furnace goes quiet.
Outside, the same logic applies to hose bibs and spigots. You protect outdoor faucets by following guidance that tells you to Disconnect and drain garden hoses, then Install covers or frost‑proof fixtures so cold air does not sit directly on the valve. If you have not yet experienced freezing faucets, the reminder that there are steps you can take to prevent future problems, including Rooter Plumbing style upgrades, is a nudge to act before the next storm. Once those pieces are in place, your outage routine becomes lighter because the most exposed parts of your system are already shielded.
Smart monitoring, flushing, and recovery once power returns
When the lights flicker back on, your job is not finished. You need to confirm that nothing froze while you were in the dark and that your system comes back online cleanly. That starts with walking your home and checking each tap for normal flow, then watching for reduced flow or frost at vulnerable spots, the kind of early warning flagged in the same guidance that urges you to watch for reduced flow or frost. If a faucet sputters or a section of pipe feels unusually cold, you treat it as a potential freeze and warm it gently before it can burst.
Once you are confident the lines are intact, you clear any sluggish water from the system. Home insurance guidance that explains how To prevent your water pipes from freezing in the first place also recommends that you run all faucets and flush all toilets several times after a cold snap, which helps purge any ice crystals or sediment that built up while flow was restricted. If you rely on smart leak detectors or connected thermostats, you can even lean on Product data and shopping tools to compare models that send alerts when temperatures drop or moisture appears where it should not, turning your outage routine into a year‑round safety net.
Putting it all together into a simple checklist
By the time the next winter storm rolls in, your goal is to have a routine that feels more like muscle memory than crisis management. You start with the basics: insulate pipes in basements, attics, and crawl spaces, open cabinets under sinks on exterior walls, and set a slow drip only on the faucets that protect long or exposed runs. Local reminders that say Here are some essential tips to Insulate Pipes and Wrap exposed lines in unheated areas reinforce that these are not luxury upgrades, they are basic maintenance.
Layered on top of that, you add outdoor prep like draining hose bibs, disconnecting hoses, and installing covers, plus indoor habits like keeping the thermostat at safe levels and closing off drafts around doors and windows. Senior‑focused guidance that starts with Jan reminders about winter’s harshest conditions, and city posts that open with Jan tips for newcomers to super cold temperatures, both underscore the same point: a little planning keeps your pipes safer so that when the power fails, you are relying on a calm, practiced routine instead of leaving every faucet running and hoping for the best.
Like Fix It Homestead’s content? Be sure to follow us.
Here’s more from us:
- I made Joanna Gaines’s Friendsgiving casserole and here is what I would keep
- Pump Shotguns That Jam the Moment You Actually Need Them
- The First 5 Things Guests Notice About Your Living Room at Christmas
- What Caliber Works Best for Groundhogs, Armadillos, and Other Digging Pests?
- Rifles worth keeping by the back door on any rural property
*This article was developed with AI-powered tools and has been carefully reviewed by our editors.