What to photograph before starting any behind-the-wall work
Once you start cutting into walls, every hidden pipe, cable, and stud layout turns from abstract plan into expensive reality. If you document those details before anything is covered, you give yourself a visual map that can save hours of guesswork, prevent damage, and protect you in disputes. Before any behind-the-wall work begins, your camera is as important as your drill.
Think of this as building your own as-built archive, tailored to how you live and work in the space. With a deliberate photo checklist and a few smart habits, you can capture everything that matters, from mechanical runs to outlet heights, so future projects rely on evidence instead of memory.
Why pre‑cover photos matter more than you think
When walls are open, you have a one-time chance to see the full story of your structure, from framing to mechanical, electrical, and plumbing runs. Once insulation and drywall go in, that information is locked away, and you are left guessing where to drill, where to hang cabinets, or how to trace a leak. Detailed images of these stages become a practical reference that you can pull up on your phone while standing in the finished room, turning invisible systems into something you can navigate with confidence.
Professionals increasingly treat this visual record as critical construction documentation rather than a nice-to-have. Guidance on site photography stresses that MEP documentation is among the most vital requirements, because once walls close, these systems are no longer accessible. By approaching your own project with the same discipline, you create proof of what was installed, where it runs, and how it was routed, which can support warranty claims, clarify scope with contractors, and reduce the risk of costly exploratory demolition later.
How to plan your shoot like a contractor
Before you start snapping, decide what you need your future self to be able to answer. You might want to know where every water line runs, how far a gas pipe sits from a stud, or exactly which bay hides a junction box. Walk the space with your floor plan in hand and sketch a simple route, room by room, so you do not miss any walls or corners. Treat it like a structured inspection rather than a casual photo walk, and you will end up with a coherent set of images instead of a random camera roll.
Construction photo specialists recommend that you capture both context and detail, not just close-ups. One guide advises you to capture wide shots that show overall conditions, then follow with tighter images of critical tasks and after shots once work is complete. If you mirror that approach, you might start each wall with a wide frame that shows the entire stud bay, then move in to document specific valves, cable bundles, or blocking. This structure makes it much easier to interpret your photos later, because every close-up has a clear visual anchor.
Framing, studs, and structural elements to capture
Your first priority is to record the skeleton of the building, since every future anchor, shelf, or wall opening depends on it. Photograph each wall straight on so you can count studs and see their spacing, then take angled shots at corners and intersections where multiple walls meet. Pay special attention to headers over doors and windows, beams, and any engineered lumber, since these elements often dictate where you can and cannot cut or drill in the future.
Specialist photography guidance on rough-in work highlights the value of documenting the location of plumbing,, and other hidden components relative to studs. When you capture framing, include reference points like floor, ceiling, and adjacent openings so you can later measure from a finished surface back to a stud centerline. This makes it far easier to find solid backing for heavy items or to avoid cutting into structural members when you open a wall for new work.
Electrical rough‑in, outlets, and switches
Electrical layouts are among the easiest things to forget once drywall is up, yet they are also among the most hazardous to guess at. Before insulation, photograph every outlet, switch, junction box, and low-voltage run, including the cables entering and leaving each box. Capture both a close-up of the box itself and a wider shot that shows its position on the wall, including the floor and any nearby windows or doors, so you can later translate that location to the finished room.
Homebuilding checklists describe the pre-drywall stage as an Important day to confirm outlets and switches are in the right place and to avoid ever driving a screw into a live wire. Another experienced builder urges you to Document, document document at this point, calling it the First and most important step in a pre-drywall walk. If you follow that lead, you will not only verify that every planned outlet exists, you will also have a photographic record to guide future additions, like adding a sconce or relocating a switch without blindly fishing through the wall.
Plumbing, HVAC, and other MEP systems
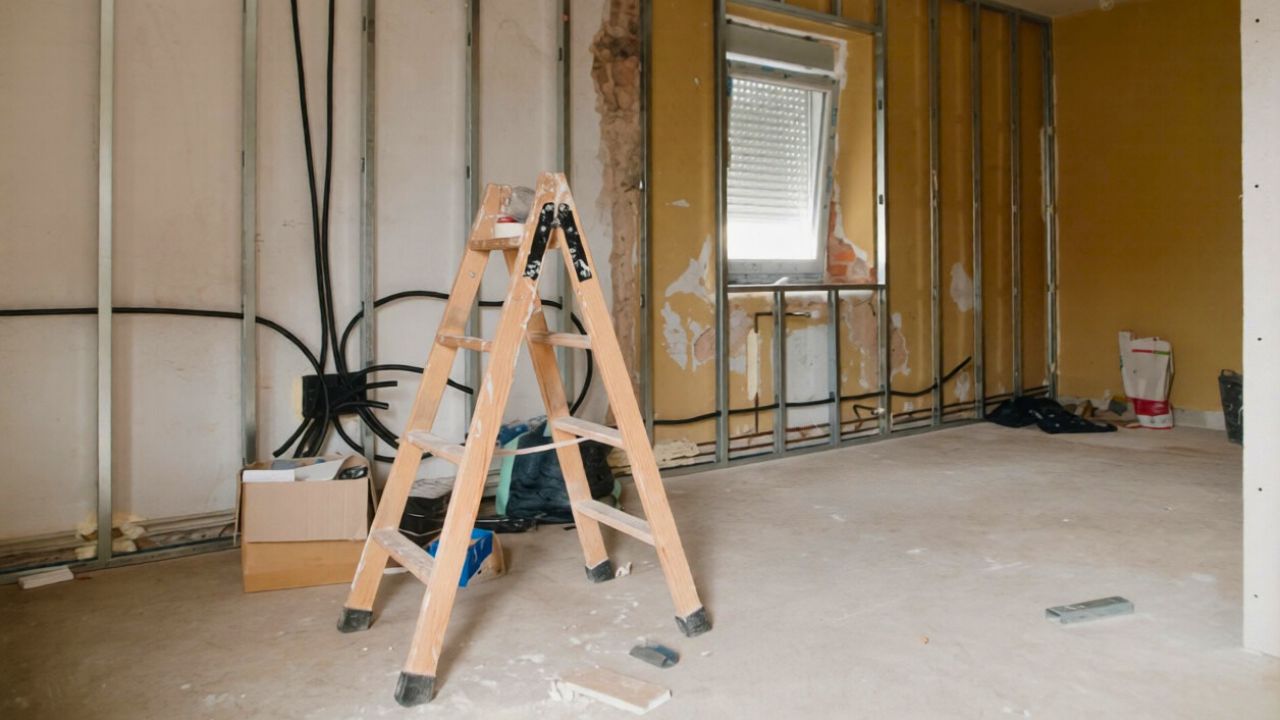
Mechanical, electrical, and plumbing systems are the arteries of your building, and once they are concealed, even professionals rely on guesswork without a record. Photograph every vertical and horizontal run of supply and drain lines, including where they pass through studs and joists. Do the same for HVAC ducts, vents, and refrigerant lines, capturing how they weave through framing and where they terminate at registers or equipment.
Construction documentation experts emphasize that critical construction photos should always include MEP systems before they are covered, especially for all new utility work. Another guide focused on rough-in photography notes that you should record the location of plumbing and similar elements so you can later avoid them when cutting or drilling. By building a clear visual map of every pipe and duct, you reduce the risk of puncturing a line during future renovations and make it easier to diagnose issues like slow drains or uneven heating without tearing open large sections of wall.
Using 360 and video to capture the full picture
Still photos are powerful, but they can miss context when you are trying to reconstruct an entire room in your mind. Short video walkthroughs and 360-degree captures fill that gap by letting you virtually stand inside the open framing long after it has been closed. A slow pan along each wall, narrated with quick notes about what you are seeing, can be invaluable when you are trying to remember which stud bay hides a particular valve or cable bundle.
Specialists in immersive imaging point out that documenting and capturing such as pipes and electrical cables before the walls are closed gives you a permanent record of installations once the walls are finished. Another construction-focused guide notes that Beyond capturing simple snapshots, a reliable visual record supports coordination, quality control, and later maintenance. If you have access to a 360 camera, a single capture in each room can show the relationship between every wall and system at once, which is especially helpful in complex spaces like utility rooms or kitchens.
Labeling, angles, and practical shooting tips
Even the best photos lose value if you cannot tell which wall or room you are looking at. As you shoot, keep a consistent sequence, such as starting at the front door and moving clockwise through the house, and repeat that pattern on every floor. Consider holding a notepad or painter’s tape label in the first frame of each room with its name, then taking the rest of the photos without it, so you can later group images by space without confusion.
Real estate and construction pros often stress volume and redundancy. One of the most widely shared new-build tips puts it plainly: One of the best habits is to take a TON of photos Before insulation and drywall go in, because you will never regret having too much information. Another experienced homeowner echoes this with the advice to Document everything at the pre-drywall stage. Use natural light where possible, step back enough to include reference points like floors and ceilings, and shoot from multiple angles so you can triangulate locations later.
Connecting hidden infrastructure to future design
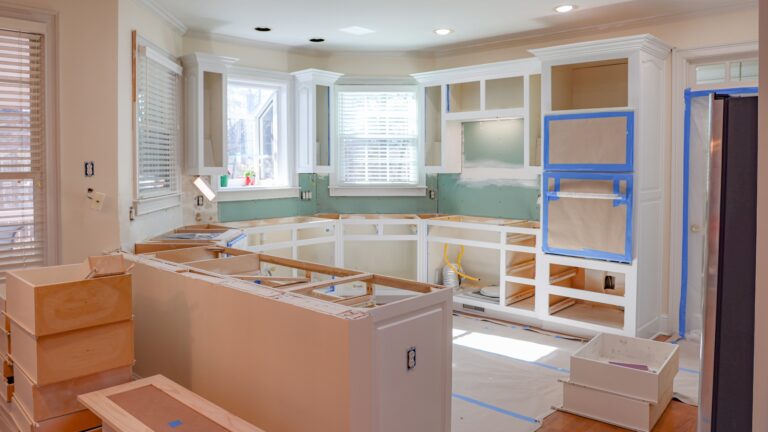
Your behind-the-wall photos are not just about safety and maintenance, they are also a design tool. When you know exactly where studs, blocking, and wiring sit, you can plan built-ins, wall treatments, and lighting with far more precision. For example, if you want a continuous tile feature wall behind a freestanding tub, your images will tell you whether there is enough solid backing for heavy fixtures or whether you need to add reinforcement before you start.
High-end interior designers often warn that visual decisions made late can clash with the underlying structure. Designer Peter gives the example of a house with a feature wall in every room, but on one wall the treatment stops abruptly because the layout was not considered consistently. Your own documentation helps you avoid that kind of mismatch by showing where you can safely run continuous finishes, recess shelving, or integrate lighting without fighting hidden pipes or cables. In practice, that means your future design choices are grounded in what the building can actually support.
Backing up and organizing your photo archive
Once you have captured hundreds or even thousands of images, the next risk is losing them to a failed phone, a misplaced SD card, or simple disorganization. Create a clear folder structure on your computer or external drive, grouped by project and room, and rename files or batches with meaningful labels like “Kitchen_north_wall_electrical” instead of leaving them as random numbers. This small investment of time will pay off when you are standing in a finished room trying to match what you see to what is in your archive.
Digital preservation experts recommend treating Cloud storage as an additional layer of backup rather than your only copy. Some services allow you to store images in folders, share photos with collaborators, and even group shots of the same location or event automatically. By keeping at least two copies, ideally one local and one in the cloud, you protect your behind-the-wall record as carefully as you protect the structure itself, ensuring that when you are ready to open a wall again, the information you need is only a search away.
Like Fix It Homestead’s content? Be sure to follow us.
Here’s more from us:
- I made Joanna Gaines’s Friendsgiving casserole and here is what I would keep
- Pump Shotguns That Jam the Moment You Actually Need Them
- The First 5 Things Guests Notice About Your Living Room at Christmas
- What Caliber Works Best for Groundhogs, Armadillos, and Other Digging Pests?
- Rifles worth keeping by the back door on any rural property
*This article was developed with AI-powered tools and has been carefully reviewed by our editors.