10 Things You Should Do Before You Open the Pool (Even If It Looks Fine)
Your pool can look perfectly clear on the first warm weekend and still hide algae spores, metal stains, or equipment damage that will cost you time and money once everyone jumps in. Treat opening day as more than a quick skim-and-swim, and you gain the chance to catch those problems while they are still easy to fix. By walking through a deliberate checklist before anyone touches the water, you protect your investment and set yourself up for a safer, cleaner season from the first cannonball.
Rather than reacting to cloudy water or broken gear in June, you can front-load the work into a focused pre-opening routine. The ten moves below turn that “it looks fine” mirage into a pool that is actually balanced, inspected, and ready for heavy use.
1. Choose the right opening week, not just the first hot day
When the first warm spell hits, it is tempting to reach for the cover, but a smarter strategy is to time your opening to the weather pattern, not your impatience. Several pool guides recommend opening once daytime temperatures stay above about 70°F, since warmer conditions wake up algae and speed up chemical reactions in the water. If you wait until midsummer to start your system, you give algae a long head start under the cover, which means more shock, more brushing, and more filter time later just to get back to a clean baseline.
On the other hand, you do not want to rush and open while your nights are still freezing, since that puts pipes and equipment at risk if you misjudge a cold snap. When you see a consistent stretch of mild days and your yard is no longer dealing with heavy spring pollen or tree debris, you are in the sweet spot to schedule a methodical opening. That window gives you time to work through a full checklist like the one described in a detailed Pool Opening Checklist without battling constant new contamination from the weather.
2. Inspect the cover and surrounding area before you move anything
Before you pull a single strap, treat the cover like a crime scene that can either protect or pollute your water. If you let rainwater and decaying leaves slide off the cover into the pool, you instantly dump organic material, phosphates, and possibly bacteria into the water that sat dormant all winter. Many step-by-step guides advise you to pump off standing water, sweep or blow off leaves, and only then remove the cover in a controlled way so that debris stays out of the pool and the cover itself can be cleaned and dried to prevent mold before storage.
As you work, also scan the deck and coping for loose stones, cracked concrete, or shifting pavers that could trip bare feet once swimming starts. One safety checklist recommends checking for sharp edges or broken hardware that might cut or snag swimmers near the waterline. By addressing those hazards before you even see the water, you separate structural and safety tasks from chemistry work and reduce the chance that a hidden trip point or rusting anchor turns into an injury when the pool is busy.
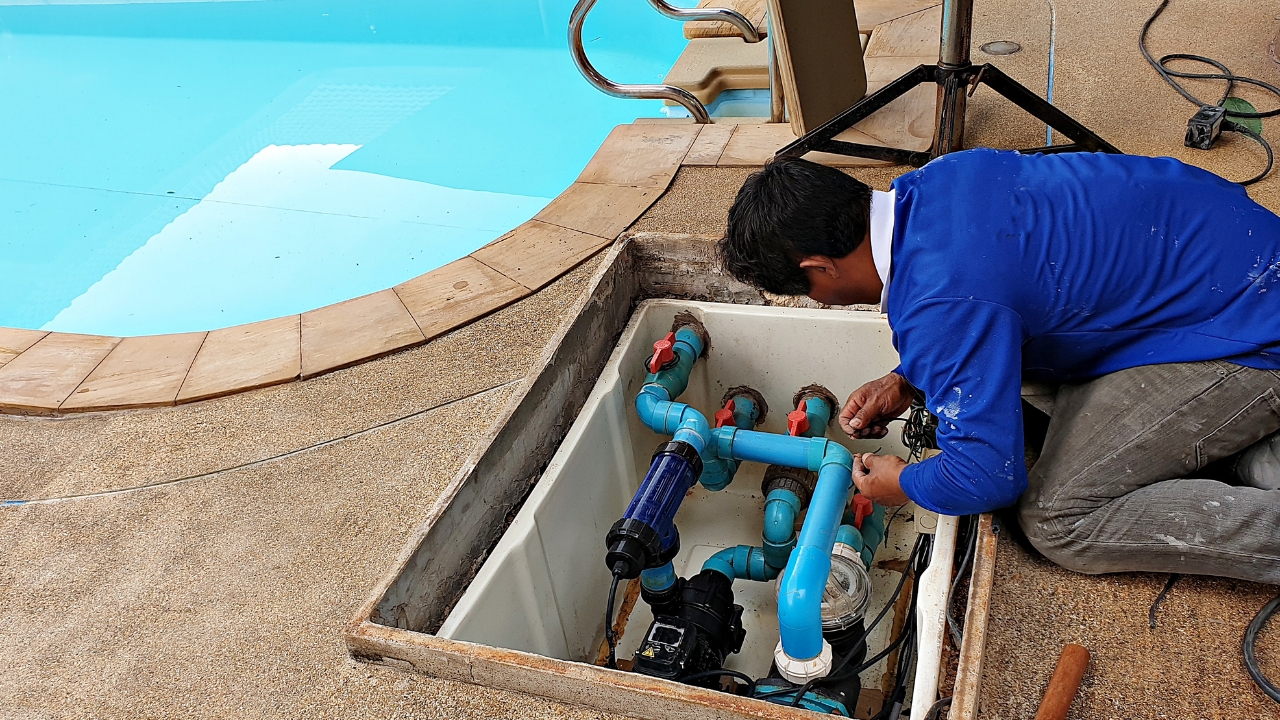
3. Do a full equipment and plumbing check before you power up
Once the cover is out of the way, your next move is not to hit the pump switch but to walk the entire equipment pad with a critical eye. Look for cracked pump lids, brittle hoses, corroded heater fittings, and any signs of leaks around valves or unions. Several opening guides urge you to reconnect unions by hand, reinstall drain plugs, and visually confirm that winterizing plugs are removed from returns and skimmers before you restore power. If you skip this step and simply flip the breaker, you risk running a pump dry or forcing water through a line that is still blocked, which can burn out a motor or blow a fitting.
Manufacturers and service pros also stress the value of inspecting your filter element or media at this stage. Whether you use a cartridge, sand, or diatomaceous earth system, you should open the tank, check for cracks or worn o-rings, and clean or replace cartridges that are clogged from last season. One detailed Pool Opening Checklist even suggests keeping spare o-rings, lube, and replacement parts on hand so you are not stuck mid-opening while you hunt for a specific gasket.
4. Give the shell and surfaces a close structural inspection
With the system still off, you have a rare chance to walk the interior surfaces and catch small problems before they expand under summer use. Look for blistering or peeling in painted pools, missing or hollow-sounding tiles, and any rust spots around fittings that might signal a leak behind the wall. For vinyl liners, check seams, corners, and around steps for wrinkles or tears, since these can spread once swimmers start pushing off the walls. Several guides recommend addressing small cracks or chips in plaster now, because they can worsen as water chemistry fluctuates over the season.
One detailed how-to from a major chemical brand advises you to look for chips or cracks that could cut feet or trap algae colonies in rough surfaces. If you see staining or scale from last year, you can plan for a targeted stain treatment or gentle acid washing before the water gets busy again. By treating the shell like a structural asset rather than just a backdrop, you extend the life of your finish and reduce the likelihood that a minor blemish turns into a costly resurfacing project.
5. Remove winter gear and clean the water the right way
Once the structure and equipment check out, you can safely remove winterizing components like skimmer gizmos, return plugs, and antifreeze where used. Several step lists emphasize taking out every winter accessory and reinstalling regular return fittings, eyeballs, and skimmer baskets before you start circulation. One guide on how to open after winter advises you to follow a clear sequence: remove winter gear, restore normal fittings, then start cleaning and vacuuming so you are not working against blocked circulation or trapped debris in the lines.
At this point, manually skim and vacuum as much visible debris as possible before you rely on your automatic cleaner. One detailed set of instructions from a water treatment company lists non-chemical tools like a test kit, pool pole, leaf rake, brush, and vacuum head as essential for this first cleanup. By brushing walls and floors to break up any biofilm, then vacuuming slowly to waste if the bottom is very dirty, you prevent your filter from clogging immediately and give your sanitizer a head start on relatively clear water instead of a swamp.
6. Run a safety inspection around fences, ladders, and power
Before anyone is tempted to swim, treat the entire pool area as a safety system that needs testing. That means checking that fences close and latch properly, that self-closing gates actually swing shut, and that any alarms on doors or gates leading to the pool still function. A seasonal checklist from an insurance-focused guide advises you to confirm that ladders and handrails are secure and that there are no loose bolts or corroded anchors that could give way under a child’s weight. You should also verify that non-slip surfaces on steps and diving boards are intact, since worn treads can turn slick once they are wet.
Electrical safety deserves the same attention. Confirm that underwater lights, junction boxes, and outlets near the pool are protected by ground-fault devices and that extension cords are nowhere near the water. One safety-focused resource recommends checking that any decorative or landscape lighting near the pool is properly rated and installed so it does not pose a shock risk. By treating this as a formal safety inspection rather than a quick glance, you reduce the chance of preventable accidents and align your backyard with the same seriousness you would expect from a public pool.
7. Test, balance, and only then shock your water
Once the physical setup is secure, you can finally turn to chemistry. Start by circulating the water for several hours with the pump running, then test pH, total alkalinity, calcium hardness, and sanitizer levels with either strips or a liquid kit. Several technical checklists recommend getting pH and alkalinity into range before you add heavy doses of chlorine or other sanitizers, since extreme pH can make those products far less effective. One guide on how to open for the season lays out a sequence that starts with basic balancing, then moves to a strong oxidizing shock to clear out contaminants that built up under the cover.
Pay attention as well to metals and stabilizer levels if you use well water or if you had staining issues in past seasons. Some expert tip sheets suggest using a sequestering agent for metals first to avoid new stains when you shock. Another resource on complete pool opening tips recommends testing pH and adjusting if necessary, then backwashing the filter after your initial cleanup so the system can handle the extra load from shocking. By approaching chemistry as a staged process rather than dumping in a pile of products at once, you protect your surfaces, save money on chemicals, and reach clear, safe water faster.
8. Stock the right chemicals and tools before problems start
A smooth opening hinges not only on what you do, but on what you have within reach. Several supply-focused guides recommend assembling a kit that includes sanitizer, shock, pH increaser and reducer, alkalinity and calcium products, algaecide, clarifier, and a reliable test method. One detailed how-to guide on opening after winter also highlights the value of products that specifically target algae and prevent new growth once the water warms up. By stocking these items early, you avoid mid-season scrambles when a storm or pool party throws your chemistry off balance.
On the hardware side, make sure you have a sturdy telescoping pole, a deep leaf rake, a wall brush matched to your surface type, and a vacuum head that works with your circulation system. A detailed set of steps from a water systems company lists test strips, a pool pole, leaf rake, brush, and vacuum head as non-negotiable tools for the first cleanup. Another step-by-step list also points out that you should top off your pool’s water to the correct level before you do serious vacuuming or backwashing, since low water lines can starve the pump and introduce air into the system.
9. Map out your first month of maintenance before the rush
Even a flawless opening will not stay that way if you treat it as a one-day event. Before you declare the pool open, plan your first four weeks of maintenance, including daily skimming, weekly brushing, and regular testing. A maintenance checklist from a service company recommends daily tasks like removing debris and checking skimmer baskets, plus weekly routines such as brushing walls, vacuuming, and inspecting for small cracks in the surface that could expand. By scheduling these jobs on specific days, you turn vague intentions into habits that keep your water stable.
It also helps to decide in advance when you will call in professional help. A detailed season-opening guide suggests that if you encounter persistent cloudiness, recurring algae, or equipment problems you cannot diagnose, you should bring in a technician rather than continue to experiment with chemicals. Another Spring Success guide notes that if you face stubborn algae or complex chemistry challenges, a professional opening can reset your water so you are not fighting problems all season. By combining a clear maintenance calendar with a realistic threshold for outside help, you give yourself a pool that not only looks fine on opening day, but stays that way through the hottest weeks of summer.
Like Fix It Homestead’s content? Be sure to follow us.
Here’s more from us:
- I made Joanna Gaines’s Friendsgiving casserole and here is what I would keep
- Pump Shotguns That Jam the Moment You Actually Need Them
- The First 5 Things Guests Notice About Your Living Room at Christmas
- What Caliber Works Best for Groundhogs, Armadillos, and Other Digging Pests?
- Rifles worth keeping by the back door on any rural property
*This article was developed with AI-powered tools and has been carefully reviewed by our editors.