Before spring chicks, the homestead prep step that saves you money and stress later
On a small homestead, the most expensive mistake with spring chicks is not a fancy feeder or the wrong breed, it is bringing fragile birds into a space that is not ready for them. When you prepare your brooder and coop weeks before the first peeping box arrives, you trade last minute panic and preventable losses for predictable costs and calmer mornings. Thoughtful groundwork turns those first six weeks from a scramble into a straightforward routine you can repeat every year.
That preparation is less about buying more gear and more about making a series of smart, low drama decisions in the right order. From checking local rules to dialing in temperatures and ventilation, each step you take before the chicks ship to your post office quietly protects your budget and your birds.
Start with rules, goals, and realistic flock size
Your most powerful stress reducer comes before you ever browse chick catalogs: deciding what you want from your flock and what your property can legally support. If you are after steady eggs for a family of four, a half dozen layers will serve you very differently than a batch of fast growing broilers, and that choice shapes everything from brooder size to feed costs. Pre planning also forces you to think about where adult birds will live, how you will manage manure, and whether you have the time to monitor heat and water several times a day in the first weeks.
That strategic pause should include a hard look at local rules. Guidance on spring poultry emphasizes that you need to familiarize yourself with local laws, city ordinances, and neighborhood covenants before you commit to chicks, because some areas cap flock size or ban roosters outright. Sorting out those constraints early lets you right size your order, avoid fines, and skip the heartbreak of rehoming birds you never should have bought.
Choose breeds and numbers that fit your budget
Once you know what is allowed, you can match breeds and quantities to your actual budget instead of to an idealized barnyard image. Some lines are bred for rapid growth and heavy feed intake, while others are lighter eaters that lay reliably for years, and that difference shows up in your monthly feed bill. Budget minded keepers are urged to choose the right breed wisely and to think through how many mouths they can afford to feed once the novelty wears off.
Planning ahead also lets you buy smarter. Instead of grabbing whatever is on the shelf the day you bring chicks home, you can watch for sales and buy supplies in bundles, from starter feed to bedding and basic supplements. That approach lowers per unit costs and reduces emergency trips to town, which is where many new homesteaders quietly overspend.
Deep clean and stage the future coop before chicks arrive
Even though your chicks will spend their first weeks in a brooder, you save yourself money and labor by getting the future coop or grow out pen ready at the same time. A clean, dry, draft free house waiting in the wings means you can move birds as soon as they feather out instead of scrambling to repair leaks or shovel out old bedding while they outgrow their brooder. Professional flock managers stress that houses for young birds should be cleaned, disinfected, and left empty for a period before new arrivals, with recommendations that the houses should have been cleaned, disinfected, and empty for at least 14 days to break disease cycles, a standard echoed in guidance on preparing for day old chick arrival.
That same mindset applies to air quality and temperature in the grow out space. Commercial broiler preparation materials note that minimum ventilation should begin before chicks arrive so the house is warm, dry, and free of excess ammonia, and that principle scales down neatly to a backyard coop. If you de winterized your coop for adult hens with extra plastic or insulation, spring is the time to reverse that, clearing the coop, checking for drafts, and confirming that any heat lamp or backup heater and extra bedding are ready, as practical spring checklists for chickens advise when they suggest you de winterize the coop and verify your heat lamp and extra bedding before the season turns, guidance that aligns with broader advice on how to prepare your chickens for spring.
Design a brooder that fits your space and skill level
The heart of your early preparation is the brooder, the enclosed space where chicks will live until they are ready for the coop. You do not need a custom built wooden box to succeed, but you do need to think through size, location, and safety before you pick up your birds. Practical guides point out that there is no single right way to set up a brooder and that you can use a large cardboard box, a plastic tub, or a sectioned off corner of a room or barn, as long as the sides are high enough and the material can handle heat and moisture, a flexibility reflected in advice that notes there is no right or wrong way and that there are many brooder options from simple boxes to more permanent pens.
Before you settle on a container, think about where it will sit for six weeks. A brooder should be close to an electrical outlet for your heating device, away from drafts and direct sunlight, and in a spot where you can easily check on chicks several times a day without waking the household at night. Practical setup checklists describe what a brooder is and emphasize locating it near power, away from pets, and on a surface that can handle spilled water and bedding, all details that are much easier to solve before the first peep than after.
Pick a brooder container and bedding that work together
Once you know where the brooder will live, you can match the container and bedding to that environment. A plastic stock tank, for example, is easy to clean and resists moisture, but it can become slick without enough shavings, while a cardboard appliance box is cheap and disposable but vulnerable to spills and enthusiastic chewing from curious dogs. Homesteading educators underline that a brooder container can be made from many materials and that the key is that the container is safe, tall enough, and compatible with your chosen bedding, a point captured in their breakdown of what to use as a brooder container.
Bedding is not just about comfort, it is about leg health, odor control, and your cleaning workload. Many keepers rely on kiln dried pine shavings because they are absorbent and give chicks good traction, while avoiding slick newspaper that can contribute to leg problems. Planning ahead lets you buy enough bedding to change it frequently in the first week, when spills are constant, and then taper to a deeper litter as chicks grow, which saves money compared with emergency small bags from the nearest store.
Dial in heat and light before chicks come home
Heat is the single most critical factor in early chick survival, and it is also where rushed setups tend to go wrong. Baby birds cannot regulate their body temperature, so they rely entirely on the microclimate you create in the brooder. Detailed brooder guides stress that heating, the most important factor, must be stable and adjustable, with a warm zone and a cooler area so chicks can move to where they are comfortable as they grow and feather out around 6 weeks of age.
To get that right, you need to test your heat source several days before chicks arrive. Guidance on using heat lamps with young birds explains that baby chicks have an immature thermoregulation system and that during the first few days you should aim for a brooder temperature around 95 degrees Fahrenheit (35 degrees Celsius) for the first week, then reduce it gradually as they grow. Other temperature charts note that chicks tend to feather out by about 6 weeks, at which point they can handle cooler conditions if the coop is dry and draft free, and they explain how to fine tune warmth by raising or lowering the lamp or adjusting bulb wattage. Doing that calibration before you bring birds home prevents both chilling and overheating, two of the fastest ways to lose chicks and your investment.
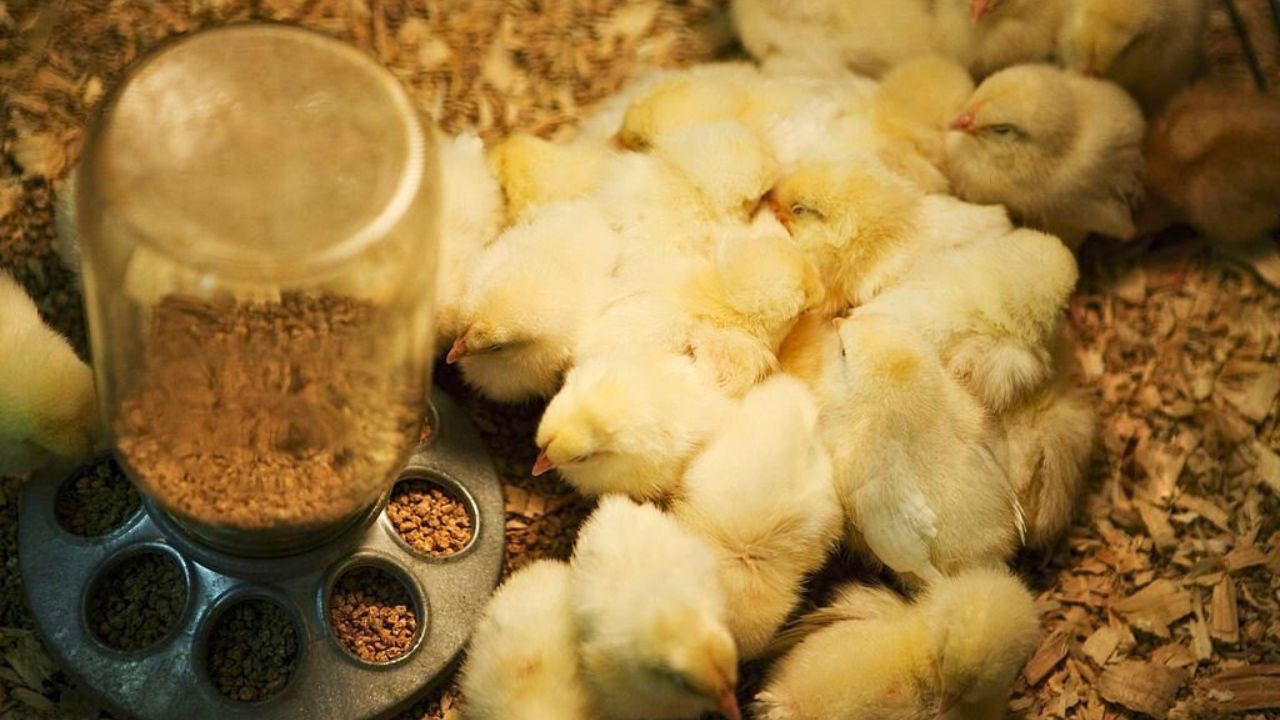
Stock feed, waterers, and a simple daily routine
With the physical setup ready, your next money saving move is to have feed and water systems in place so you are not improvising with kitchen bowls. Chicks need a high protein starter ration formulated with the right balance of protein, vitamins, and minerals, and they need it available at all times in feeders that minimize waste and contamination. Practical chick care primers describe how, before you bring home your chicks, you should have a warm, secure brooder plus appropriate feed and waterers ready, and they highlight that a good starter feed delivers the protein, vitamins, and minerals young birds require, a point reinforced in advice on setting up a safe and cozy brooder.
Water is just as critical, and it is where many new keepers underestimate both the mess and the risk. Shallow chick waterers prevent drowning and keep down spills that soak bedding and chill birds, and they are easier to sanitize than improvised dishes. Budget focused guides point out that feed, bedding, and supplements can add up quickly and that planning for appropriate feeders and waterers helps you avoid spills and contamination issues, advice that dovetails with the broader reminder that feed, bedding, and supplements can strain a budget if you are constantly replacing ruined supplies. Building a simple daily routine around topping up feed, changing water, and spot cleaning bedding keeps those costs predictable and your flock healthy.
Plan the trip home and the first 48 hours
The final piece of preparation is logistical rather than structural, and it is where many homesteaders either save or waste money on vet bills and replacement chicks. You should know exactly when your birds will arrive, how long they will be in transit, and how you will get them from the store or post office to your brooder without chilling or overheating them. Commercial broiler planning materials emphasize that planning should start well before chicks arrive, including confirming delivery date, time, and number of chicks, and that same discipline pays off on a small homestead when you arrange your schedule so birds are not sitting in a box while you finish errands.
Once you walk in the door, your only job should be to transfer chicks quickly into a brooder that is already at temperature, with warm water and feed waiting. Extension style guidance on bringing baby birds home notes that you can use a variety of brooder setups and that the key is to have them warmed and ready before you open the box, a principle captured in their practical tips for bringing baby chicks home. By front loading that work, you avoid the frantic scene of assembling heat lamps while peeping birds cool on the counter, and you give your flock the calm, warm start that protects both their health and your investment.
Keep a short checklist for ongoing adjustments
Even the best preparation will not spare you from every surprise, but it will give you a framework for small, low stress adjustments instead of big, expensive fixes. A simple checklist on the wall near your brooder, covering temperature checks, water levels, feed, bedding condition, and chick behavior, turns vague worry into a quick daily scan. Temperature charts for brooding remind you that as chicks tend to feather out you should gradually lower heat, and that if you see piling under the lamp you may need to lower it or increase wattage, while panting and spreading away from the heat suggest the opposite.
That same checklist can include calendar reminders for coop transitions and health checks. Professional rearing guidance on preparing for a good start notes that the brooding period has clear objectives, from growth targets to feather development, and while you may not weigh every bird, you can still watch for steady growth, clean vents, and active behavior. By treating those observations as part of your routine rather than as emergencies, you keep your flock on track and your spring chick season closer to the calm, cost effective experience you planned for in the first place.
Like Fix It Homestead’s content? Be sure to follow us.
Here’s more from us:
- I made Joanna Gaines’s Friendsgiving casserole and here is what I would keep
- Pump Shotguns That Jam the Moment You Actually Need Them
- The First 5 Things Guests Notice About Your Living Room at Christmas
- What Caliber Works Best for Groundhogs, Armadillos, and Other Digging Pests?
- Rifles worth keeping by the back door on any rural property
*This article was developed with AI-powered tools and has been carefully reviewed by our editors.