The home inventory shortcut that takes 20 minutes and pays off later
Your future self, the one who might be staring at a charred foundation or a ransacked living room, needs you to spend 20 quiet minutes with your phone today. A fast, video-based home inventory will not only help you prove what you owned after a fire, theft, or burst pipe, it can also speed up insurance claims and keep you from leaving thousands of dollars on the table. Instead of obsessing over a perfect spreadsheet, you can capture the essentials in one focused walkthrough and refine the details later.
The shortcut is simple: you walk, you film, you talk. By treating your home like a movie set and your smartphone like a documentary camera, you can record the big-ticket items, the serial numbers, and the small things that add up, then back that footage up to the cloud. The result is a living record of your belongings that you can update in short bursts, rather than a massive project you never start.
Why a 20‑minute video beats a perfect list
When disaster hits, you are not going to remember every pair of shoes, every pan, or the exact model of the television that used to hang on the wall. Trying to reconstruct your belongings from memory can feel like listing out 300,000 items while your brain is still in shock, which is why a quick video you shot on a calm afternoon is so valuable. A short recording gives you visual proof of what you owned and how it looked, and it is far easier to create in one sitting than a meticulous written catalog.
Insurance specialists like Jun Severa have pointed out that one of the fastest and simplest ways to document your belongings is to spend 15 or 20 minutes with a video camera or your iPhone, walking room to room and capturing your most valuable items as you go, a method echoed by experts such as Wong who stress the importance of including those valuable items in your sweep, guidance that is laid out in detail in One of the most widely cited home inventory playbooks. By leaning on video instead of perfectionism, you trade a project that might never get finished for a quick, good-enough record that can make a real difference when you file a claim.
Understanding what a home inventory actually is
Before you hit record, it helps to be clear on what you are creating and why it matters. A home inventory is simply a documented list of your possessions, paired with enough detail to show an insurer what you owned and what it was worth, so they can calculate how much to pay after a covered loss. That documentation can be written, photographed, or filmed, but the goal is always the same: to bridge the gap between your memory and the hard evidence a claims adjuster needs.
Financial organizers describe a home inventory video as a way to document the valuable possessions in your home in a format that is easy to store, easy to share with an insurer, and even useful if you ever need to track down a thief, a definition spelled out in resources that explain What this kind of video really is. When you think of your inventory as a flexible, multimedia record rather than a rigid spreadsheet, it becomes much easier to start with a quick video and layer in photos or notes later.
The 20‑minute walkthrough: how to film it
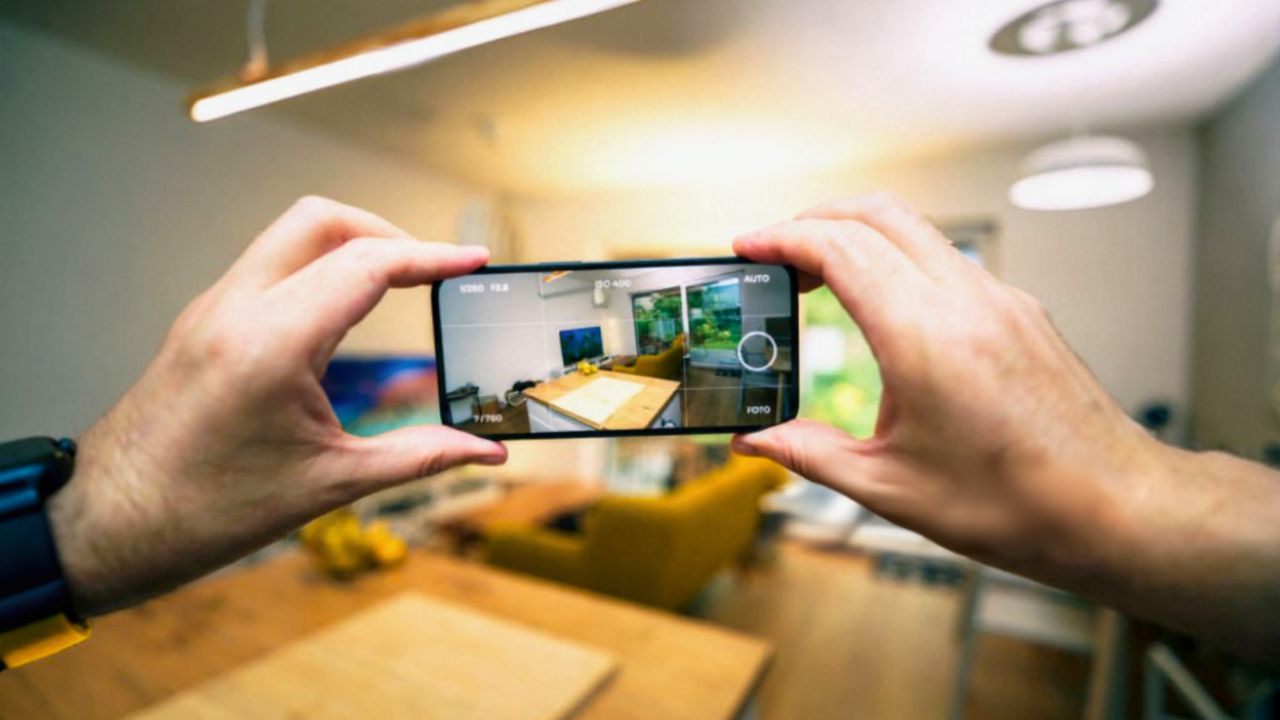
The most efficient way to build your inventory is to treat your phone like a roaming camera crew and your home like a series of sets. Start at your front door, hit record, and move methodically through each room, panning slowly so every wall, shelf, and surface is visible. Narrate as you go, saying what each item is, roughly when you bought it, and anything notable about its condition, even if you feel a little silly talking to yourself.
Insurance guides that focus on speed recommend taking a video of each room in your house to make the inventory process easier, and they note that a complete video inventory should be stored safely, either on an external drive or in the cloud, advice that appears in checklists built around Taking a room-by-room approach. Other step-by-step guides suggest you simply walk through each room, panning the camera to record all the contents, and use a voice-over to relay details such as purchase dates and brands, then remember to update that video inventory from time to time, a method captured in instructions that begin with the word Simply. By following that script, you can cover an entire home in roughly 20 minutes without stopping to write anything down.
What to say while you film
Your narration is where a quick video turns into a powerful record. As you move through each space, say out loud what you are pointing at, including the brand, the model if you know it, and any special features or upgrades. If you are filming your kitchen, for example, you might say, “Stainless steel Samsung French door refrigerator, purchased in 2023, with ice maker and water dispenser,” then tilt the camera to capture the logo and any labels.
One detailed guide on how to make a home inventory video emphasizes that you should use narration even if you feel awkward, because talking over your video helps you remember what you owned and gives an adjuster context, and it suggests that while you are filming you should open drawers and closets so you do not miss categories like clothing or tools, advice laid out under headings such as How to make a home inventory video and Use narration. By speaking in full, descriptive sentences, you give yourself a richer record to work from later, even if you never get around to typing everything into a spreadsheet.
Capturing the details that matter to insurers
While a broad sweep of each room is a strong start, certain details carry extra weight when it comes time to settle a claim. For electronics, appliances, and other high-value items, zoom in on the make, model, and serial number plates, and say those numbers out loud as you film. Do the same for jewelry appraisals, artwork signatures, and any receipts you still have, holding them steady in front of the camera for a few seconds.
Claims experts advise that for bigger ticket items like electronics you should include serial numbers by pointing the camera at the make, model, and serial labels and narrating them, because that information can help an insurer replace your item with one of equal value, guidance spelled out in sections that begin with the word Include. Other checklists on what to include in your home inventory stress that the more detailed your record, the better, and they specifically call out electronics, furniture, and close-ups of serial numbers as priorities, advice organized under headings such as What to include, Include close-ups, and even a section titled Your Home Inventory that spells out why those details matter. By weaving those specifics into your 20-minute pass, you dramatically increase the odds that your claim will be paid accurately and quickly.
Using your smartphone camera like a pro
The camera you already carry is more than good enough to build a strong inventory, as long as you use it intentionally. Start by cleaning the lens, switching to video mode, and holding the phone horizontally so you capture more of each room. Move slowly to avoid blurry footage, and pause for a beat on anything that would be expensive or difficult to replace, such as a gaming PC, a vintage guitar, or a high-end stroller.
Photo and video organizers who specialize in fast documentation recommend a simple sequence for getting started, describing it as “Getting Started: The Fast, Simple Way,” and they specifically tell you to Use Your Smartphone Camera by opening the camera app, switching to video, and then walking through your home while capturing both wide shots and close-ups, followed by still photos of especially important items. They also suggest that once you have the basics on video, you can snap additional photos of collections, like rare sneakers or first-edition books, and store those alongside your footage so everything is easy to find later.
Why this shortcut pays off at claim time
The real payoff for your 20-minute effort shows up when you are dealing with an adjuster instead of a to-do list. With a video inventory, you can scroll through each room, pause on specific items, and pull still images or timestamps to answer questions about what you owned. That visual record can help you remember items you would otherwise forget, and it gives the insurer something concrete to work with instead of relying solely on your recollection.
Consumer advocates who work with policyholders after disasters note that most policies these days are RC, or replacement cost, which are supposed to cover the cost of replacing an item at present day value, but if you have an ACV policy, or actual cash value, depreciation will be deducted, a distinction explained in guidance that begins with the word Most. They also stress that having a clear inventory, stored where it will be easy to access, can make it far simpler to prove what you owned and argue for the correct payout under either type of coverage, which is exactly what your quick video is designed to do.
Fitting the shortcut into your insurance strategy
A fast video inventory is not just a nice-to-have, it is a practical part of how you manage your coverage. Once you have your footage, you can sit down with your policy and check whether your personal property limits and special sublimits for categories like jewelry, firearms, or collectibles actually match what you own. If your video reveals that your camera gear or designer handbags are worth more than your current limits, you can talk to your agent about scheduling those items or increasing your coverage.
Insurance checklists that walk you through creating an inventory for coverage purposes advise that regardless of which method you choose, you should follow a few basic rules, including “Start small” and “Don’t get overwhelmed,” and they remind you to record details like the make, model number, and purchase price of major items, guidance laid out in sections that begin with phrases such as Regardless of method, Start small, and Don’t let the project stall. Other homeowner resources underline that your home is filled with personal treasures and expensive items, and that it is important to keep track of all of it for your own peace of mind, a point made in guides that open with the phrase Your home is filled with personal treasures. By pairing your quick video with a policy review, you turn a simple recording into a cornerstone of your financial safety net.
Backing up, updating, and actually using your video
Once you have your 20-minute walkthrough, the final step is to make sure it will be there when you need it. Upload the file to a cloud service like Google Drive, iCloud, or Dropbox, and consider saving a copy on an external hard drive stored outside your home, such as in a safe deposit box or at a trusted relative’s house. Then set a reminder to repeat the process or add short update clips after major purchases, renovations, or moves.
Video tutorials on creating a home inventory with photos and videos point out that after a loss you may not be able to think straight, and trying to come up with your list of 300,000 items for your insurance company from memory is unrealistic, which is why they walk viewers through backing up footage and keeping it accessible, a point made explicitly in a segment that references the figure 300,000. Other explainers on how to do a home inventory encourage you to hit each room, then upload your video and any photos or documentation to the cloud so they are safe even if your home is not, advice captured in step-by-step clips labeled with the month Aug. If you ever need to file a claim, you can share the video link with your adjuster, pull still images for specific items, and use the footage as a memory aid while you fill out claim forms.
Turning a one‑time sprint into an easy habit
The beauty of the 20-minute shortcut is that it lowers the barrier to getting started, but its real strength comes when you treat it as the first step in an ongoing habit. After your initial walkthrough, you can add short clips whenever you buy something significant, like a new MacBook Pro, a Peloton bike, or a set of custom wheels for your car. You can also snap photos of receipts and warranties and store them in the same folder as your video, so everything related to your belongings lives in one place.
Some insurance and organizing guides suggest that once you have the core video, you should update your inventory from time to time, especially after big life changes, and they offer practical tips like using your phone to capture new purchases as you unbox them, a strategy echoed in checklists that talk about Then taking photos of those as well. Other resources on creating a home inventory for insurance claims emphasize that while you are filming you should remember to open closets and storage areas, and that you, as the homeowner, are the one who will benefit most from having that record, advice framed in sections that begin with the words You and While. By treating your inventory as a living file rather than a one-time chore, you keep it accurate with just a few minutes of effort each year, and you ensure that the 20 minutes you invest today will keep paying off long into the future.
Like Fix It Homestead’s content? Be sure to follow us.
Here’s more from us:
- I made Joanna Gaines’s Friendsgiving casserole and here is what I would keep
- Pump Shotguns That Jam the Moment You Actually Need Them
- The First 5 Things Guests Notice About Your Living Room at Christmas
- What Caliber Works Best for Groundhogs, Armadillos, and Other Digging Pests?
- Rifles worth keeping by the back door on any rural property
*This article was developed with AI-powered tools and has been carefully reviewed by our editors.