10 Spring Mulch Mistakes That Make Your Beds Look Messy
Mulch can make your spring beds look polished or permanently half finished. Spread the wrong way, it flattens plants, invites pests, and leaves your borders looking like a construction site instead of a garden. With a few targeted fixes, you can avoid the most common mistakes and turn the same bag of mulch into a clean, cohesive backdrop for your plants.
The difference comes down to technique rather than budget. How you clear the bed, how deep you spread, and what materials you choose all show up in the final look. Tighten up these ten problem spots and your spring refresh will read as intentional design instead of a messy afterthought.
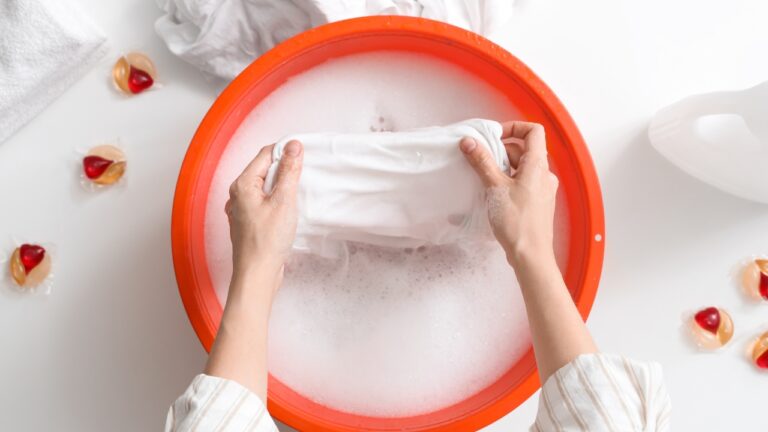
1. Skipping the clean‑up before you spread
Start flinging mulch over whatever is already on the soil and you lock in chaos. Old leaves, matted weeds, and last year’s spent stems keep the surface lumpy, so your new layer never lies flat. You also trap weed seeds and debris where you cannot easily remove them, which means you will see random tufts of green punching through the fresh surface within weeks. That patchy regrowth makes beds look neglected even when you just worked on them.
Before you open a single bag, clear the area with the same care you would give a paint surface. Pull existing weeds, cut back dead growth, and rake away loose thatch so the soil is visible and level. One guide on why your mulch looks messy stresses that if you ignore this step and start throwing mulch on of whatever is there, you lose both neatness and effectiveness. Treat the clean‑up as part of the job, not as optional prep, and your finished beds will have a smooth, uniform base that reads as intentional from the curb.
2. Mulching at the wrong time in spring
Even if your technique is solid, timing can sabotage the look of your beds. Rush to mulch while the soil is still cold and saturated and you trap moisture and chill around plant crowns, which can delay growth and leave beds looking bare for longer. Wait until weeds are already established and you end up mulching around them or burying them halfway, which produces a lumpy surface with green intruders sprouting through the new layer.
You get a neater result when you coordinate mulch with the natural rhythm of your yard. Many landscape guides recommend treating late spring as your sweet spot, since seasonal rain helps break down organic material and settle it into the soil. One step‑by‑step resource on how to lay mulch notes that when to lay matters as much as how deep you go, with late spring or fall providing the best balance of moisture and temperature. Time your work for that window and the mulch will knit into the soil instead of sitting on top as a soggy or dusty crust.
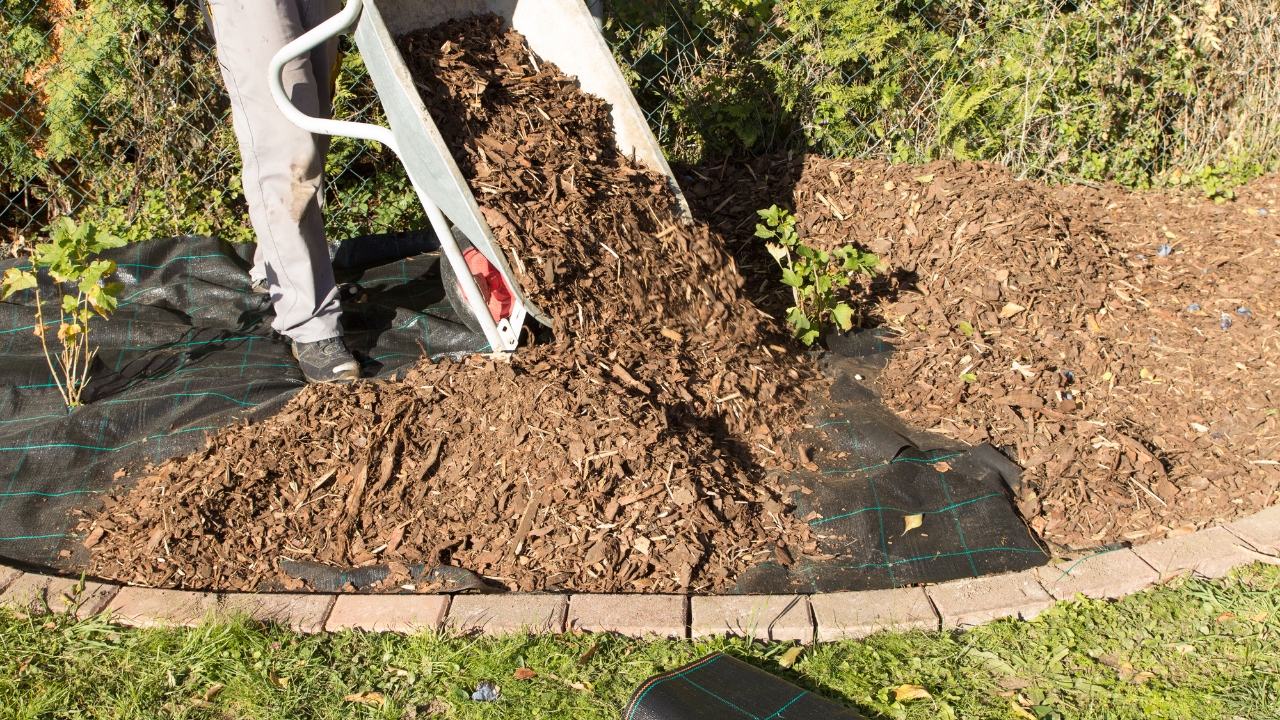
3. Piling on too much mulch
Overdoing the depth is one of the fastest ways to turn a tidy material into a visual mess. Pour on a thick blanket and the surface slumps into heavy ridges and mounds that draw the eye away from your plants. Excess depth also creates a barrier that sheds water and blocks air, which can leave the soil underneath sour and compacted. As plants struggle, they often push up weak, pale growth that clashes with the dark, overbearing mulch layer.
Professionals repeatedly warn that using too much mulch does more harm than good. Several guides describe using too much as one of the most common errors, since deep piles can suffocate roots and encourage rot at the base of plants. Other recommendations on spring best practices suggest keeping most beds in the range of one to three inches, which is enough to suppress weeds and conserve moisture without creating a soggy, unstable surface. Aim for that moderate depth and rake the layer level so your beds look groomed instead of buried.
4. Skimping so the soil still shows
Underdoing mulch can look just as sloppy as overdoing it. Scatter a thin dusting across the bed and bare soil and old material peek through in patches, which makes the surface read as streaky and unfinished. Because the layer is so light, it also fails to block sunlight from weed seeds, so you quickly get a mix of fresh mulch and new weeds that compete visually with your plantings.
Several turf and garden guides flag too little mulch as a mistake that cancels out many of the benefits you are trying to achieve. Other advice on using mulch correctly points out that organic materials have to be applied thick enough to create a barrier, since a thin scatter will be much less effective at preventing weeds and insulating soil. If you can still see wide streaks of soil after you rake, add enough material to create a continuous, even blanket so the color and texture look deliberate instead of stingy.
5. Creating “mulch volcanoes” around trunks and stems
One of the most obvious eyesores in a yard is the tall cone of mulch heaped around a tree trunk or shrub base. These so‑called volcanoes look unnatural, and they also hide the natural flare where a trunk meets the roots. The result is a bed that looks more like a series of burial mounds than a planted space, with each tree or shrub swallowed by a ring of material that can stain bark and invite decay.
Landscape specialists repeatedly caution that mulch should never be packed directly against trunks or stems. Guidance on common mulching mistakes explains that you should keep mulch from accumulating directly against bark so you do not trap moisture and pests at the base. Other spring practice checklists echo that point and recommend keeping mulch off the collars of trees and shrubs, since that area needs air and quick drying between rains. If you pull material back a few inches from each trunk and maintain a flat, saucer‑like ring instead of a cone, your beds will look cleaner and your woody plants will stay healthier.
6. Choosing the wrong type or color for your garden
Even if your depth and timing are perfect, the wrong mulch material can throw off the entire look of your beds. Coarse nuggets around fine perennials, or bright artificial colors next to a subtle cottage planting, create visual noise that distracts from the plants you are trying to highlight. Some products also fade quickly, leach dyes, or break down into an uneven mix of chunks and dust, which leaves you with a patchwork surface by midsummer.
Several expert lists of mulching dos and do nots warn you to be selective about both type and color. One set of gardening tips specifically advises you to avoid using dyed that can bleed or create unnaturally harsh tones in a mixed border. Other flower garden guidance notes that shredded hardwood mulch is an excellent choice for beds, since its texture fits well with perennials and it breaks down into a fine, even layer. Match the material to the style of your planting and favor natural tones over gimmicky colors so your mulch frames the plants rather than competes with them.
7. Ignoring soil prep and edging
When you skip soil preparation, the surface under your mulch stays uneven and prone to erosion. Small divots, compacted patches, and leftover roots create high and low spots that telegraph through the finished layer, so you end up with ridges and hollows instead of a smooth carpet. Without a defined edge, the mulch also tends to creep into lawn or spill over paths, which blurs the line between bed and turf and makes the entire space look less intentional.
Several practical guides list preparing the soil as a key mistake that reduces both plant health and appearance. Others emphasize simple edging as part of good technique, since a clean trench or defined border keeps mulch contained and visually sharp. If you loosen the top layer of soil, level obvious bumps, and cut a crisp edge before you spread, the mulch will settle into a neat, continuous plane that frames your planting instead of spilling into everything around it.
8. Smothering flowers and perennials
When you spread mulch without watching where it lands, it tends to bury the smallest plants first. Low perennials, young annuals, and emerging bulbs can disappear under a few careless shovelfuls, which leaves bare gaps in the design and wastes the money and time you invested in those plants. Even if they are not fully buried, a thick collar of mulch around delicate stems can trap moisture and cause rot, so you end up with wilted foliage and random holes in what should be a continuous planting.
Several yard care checklists point out that using too much can smother small plants and flowers, especially when you do not pull it back from crowns after spreading. Other flower bed advice reminds you that people are often surprised that mulch can be too much of a good thing, especially around tender ornamentals. If you place mulch by hand around low plants, keep the depth shallow over root zones, and brush material off any buried foliage, your beds will keep their full, layered look instead of turning into a blank sea of bark.
9. Forgetting that mulch needs maintenance
Once mulch is down, it is easy to treat it as a set‑and‑forget fix, but that is how neat beds slowly slide into disorder. Wind, rain, and foot traffic shift material over time, which exposes bare patches in some spots and creates drifts in others. Organic mulch also fades and breaks down, so the rich color you see in spring can turn gray and stringy by late season, leaving borders that look tired and neglected.
Good results come when you treat mulch as part of your regular maintenance, not a one‑time project. One practical guide on mulching best practices recommends checking the depth periodically and topping up only where the layer has thinned, rather than dumping a fresh load over everything. Another set of mulching tips for flower beds stresses that people frequently underestimate how much light raking and spot repair can restore a tidy look. If you fluff compacted areas, pull mulch back from trunks, and refresh only the most faded surfaces each season, your beds will keep their clean lines and healthy plants without the lumpy buildup that makes so many yards look messy.
Like Fix It Homestead’s content? Be sure to follow us.
Here’s more from us:
- I made Joanna Gaines’s Friendsgiving casserole and here is what I would keep
- Pump Shotguns That Jam the Moment You Actually Need Them
- The First 5 Things Guests Notice About Your Living Room at Christmas
- What Caliber Works Best for Groundhogs, Armadillos, and Other Digging Pests?
- Rifles worth keeping by the back door on any rural property
*This article was developed with AI-powered tools and has been carefully reviewed by our editors.