6 Cleaning Tools That Actually Work on Grout
Grout is one of those things you don’t really notice… until it’s dingy everywhere. Then it’s all you can see. The problem is, a lot of “grout hacks” either don’t do much or take way more effort than they’re worth.
The good news is you don’t need a closet full of gear. A few solid tools, used the right way, can get grout back to looking clean without you spending your whole weekend on your hands and knees.
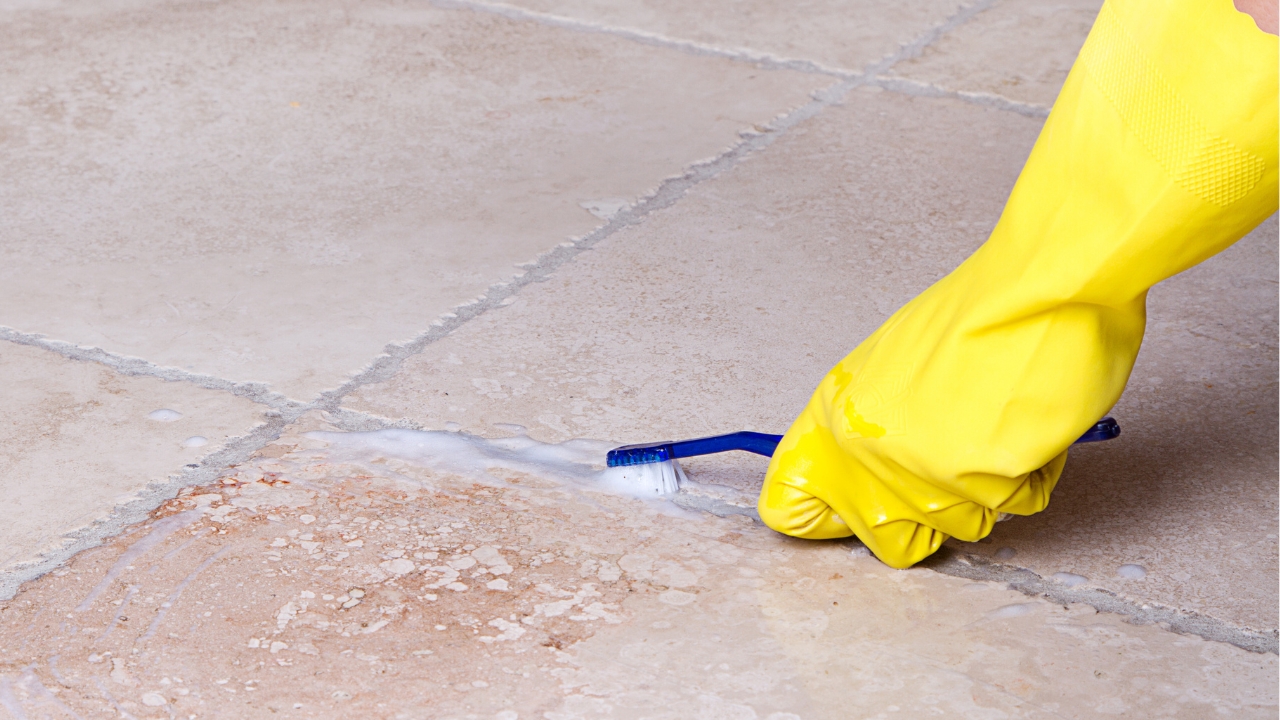
1. A stiff, angled grout brush

A basic stiff-bristle grout brush is still one of the best tools you can own. The key is in the shape: you want narrow, angled bristles that actually fit down in the grout line instead of skimming over the top.
Use it with your favorite cleaner—store-bought or a simple mix like baking soda and a little dish soap. Let the cleaner sit a few minutes, then work the brush along the lines in short strokes. You don’t have to scrub so hard you’re shaking the walls. The brush does most of the work if the bristles are firm enough and sized for grout.
Keep this brush labeled and only use it for grout so it doesn’t turn into a general scrubber that never really does any job well.
2. A small handheld power scrubber
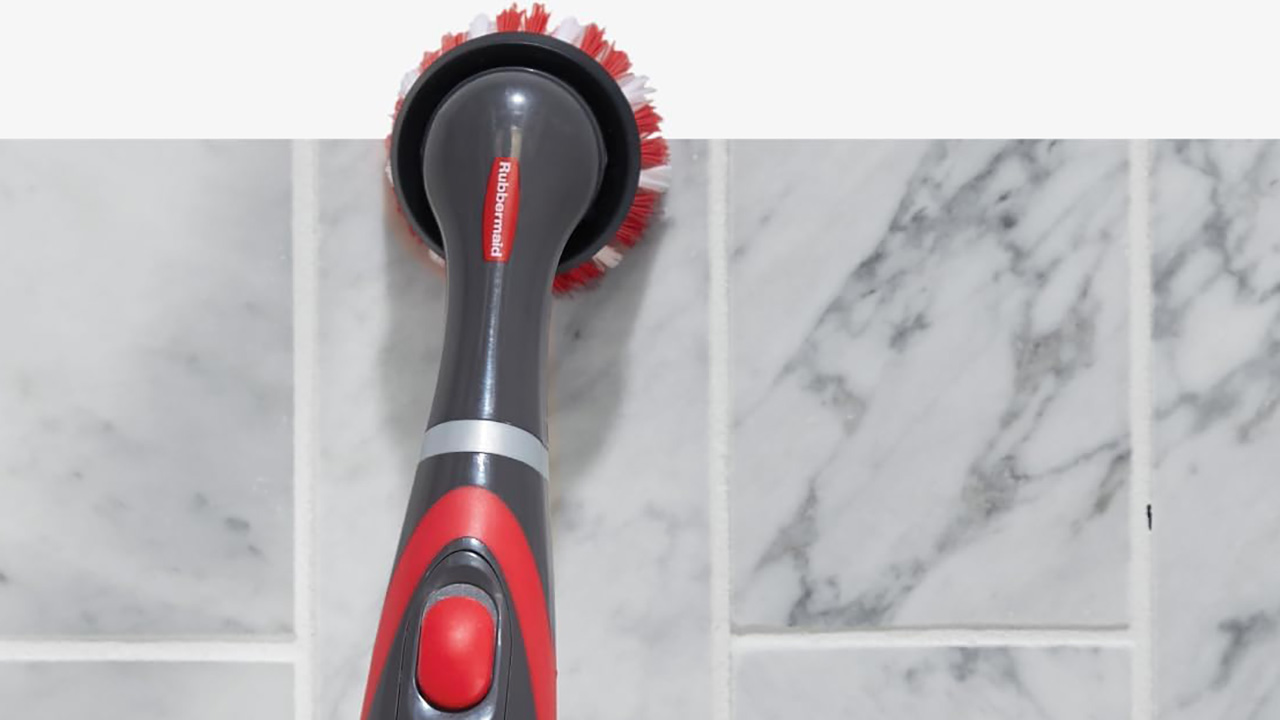
If scrubbing by hand makes you want to ignore grout for another year, a handheld power scrubber earns its keep fast. These are small, battery-powered tools with round brush heads that spin for you.
They’re especially helpful on large floors, showers, or anywhere the grout lines are really stained. You still need cleaner (or a paste) on the lines, but instead of grinding away with your wrist and shoulder, you let the scrubber’s head do the repetitive motion.
Look for one with multiple brush heads—narrow for corners, medium for grout, and softer heads for more delicate surfaces. It’s not a miracle machine, but it will absolutely cut down on how sore you feel after tackling a big area.
3. A steam cleaner with a grout attachment
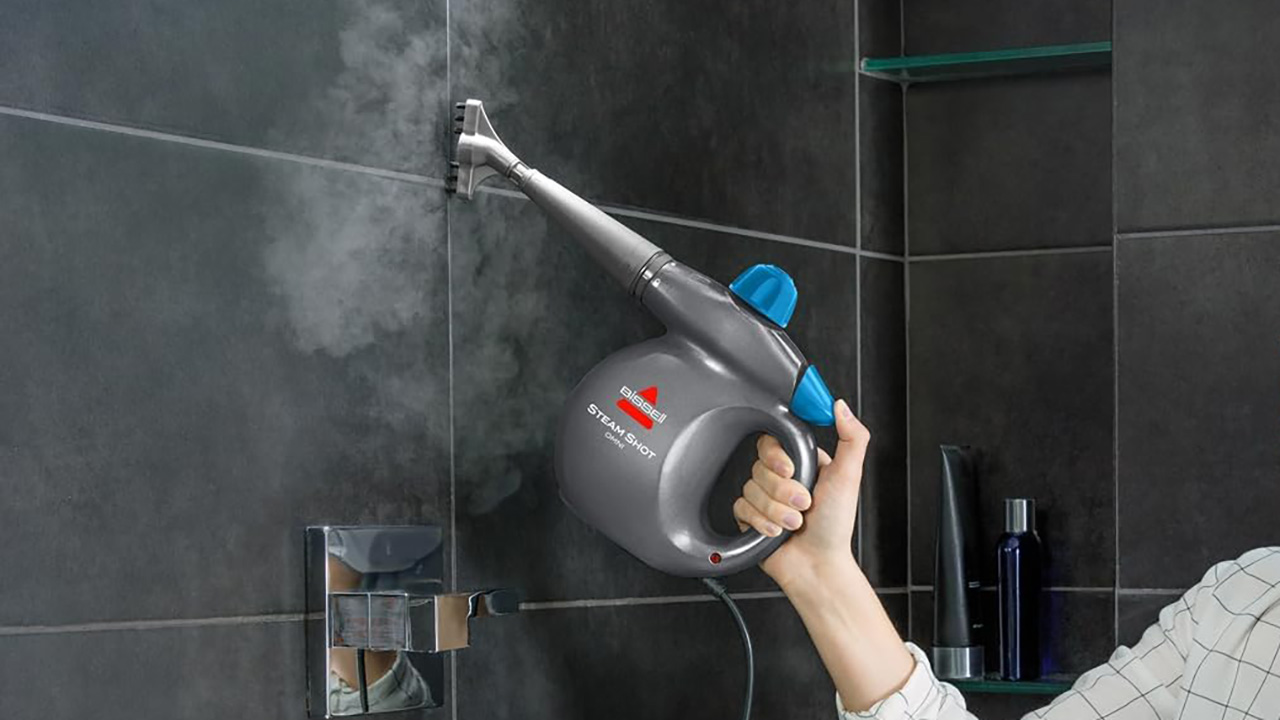
Steam is great when you want fewer chemicals and more heat doing the work. A small steam cleaner with a grout or detail brush attachment can loosen grime that’s really baked in.
The trick is to move slowly. Let the steam and heat sit on the line for a few seconds before gliding along. Then, wipe up loosened gunk with a microfiber cloth or mop as you go so it doesn’t resettle.
This works especially well in bathrooms where soap scum, body oils, and mildew mix together on tile and grout. It’s not completely effortless—you still have to guide it—but it can reach into pores of the grout in a way regular mopping doesn’t.
4. A good-quality eraser sponge (used smartly)

Magic-eraser-style sponges can be helpful on surface stains and lighter grout lines, especially on vertical areas like shower walls. They act like a super-fine sandpaper, so you don’t want to go wild with them, but used sparingly, they can brighten dingy spots fast.
Wet the sponge, squeeze it out well, and gently rub along stained areas. Follow up with a rinse and wipe with a regular cloth. This tool shines on small patches of discoloration or touch-ups between deeper cleans.
Avoid scrubbing in one spot forever—if the stain doesn’t budge after a few passes, it probably needs a different approach, not more pressure.
5. A narrow detail brush for corners and edges
Grout right up against walls, cabinet bases, or shower edges is always the worst. A narrow detail brush—like a stiff old toothbrush, a dedicated detailing brush, or even a small nylon brush set—makes a huge difference.
Use these for:
- Tight corners where a big brush can’t reach
- Around drains and fixtures
- Along baseboards where mop heads skip
Pair the brush with the same cleaner you’re using on the rest of the grout and treat these areas like a “detail pass” at the end. It only takes a few extra minutes and helps the whole space look evenly clean instead of “good except for the edges.”
6. A grout sealer applicator bottle or brush

This technically isn’t a cleaning tool, but it’s what keeps you from having to scrub as often. Once you’ve deep-cleaned grout and let it dry completely, a grout sealer applicator helps protect all that work.
These usually come as a small bottle with a roller or brush top that lets you run sealer right down the lines. The sealer helps repel spills, stains, and everyday grime so it doesn’t sink in as quickly.
You don’t have to seal every month—usually once a year (or less in low-traffic areas) is enough. But that one step means the next time you grab your grout brush, you’re dealing with light buildup instead of full-on discoloration.
With a stiff brush, one powered option, a detail brush, and a plan to seal afterward, grout stops feeling like an impossible project and turns into something you can actually stay on top of.
Like Fix It Homestead’s content? Be sure to follow us.
- I made Joanna Gaines’s Friendsgiving casserole and here is what I would keep
- Pump Shotguns That Jam the Moment You Actually Need Them
- The First 5 Things Guests Notice About Your Living Room at Christmas
- What Caliber Works Best for Groundhogs, Armadillos, and Other Digging Pests?
- Rifles worth keeping by the back door on any rural property
*This article was developed with AI-powered tools and has been carefully reviewed by our editors.