You’re using the wrong glue on baseboards and it will pop later
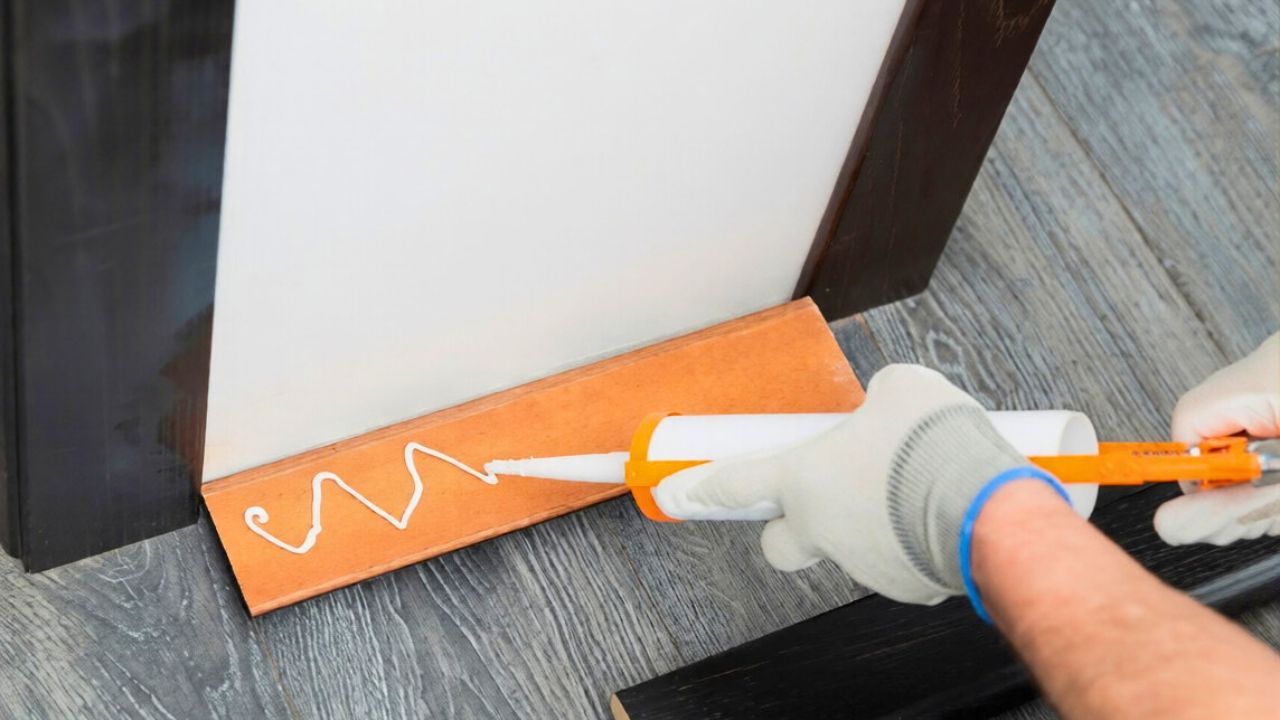
Photo credit: Aguus108/Shutterstock.com
You put a lot of effort into cutting clean miters and coping tricky corners, yet the wrong glue choice can quietly undo that work and leave your baseboards gapping or popping away from the wall. The adhesive you reach for in the aisle is not just a detail; it determines whether your trim feels rock solid in five years or starts to move with every season. When you match the glue to the material, the wall, and the way your house moves, you lock those boards in place instead of setting them up to fail.
The good news is you do not need a shop full of specialty products to get it right. You just need to understand what each adhesive actually does once it is buried behind paint and caulk. Paired with smart nailing and prep, the right glue lets your baseboards stop relying on luck and start behaving like a permanent part of the room.
Why baseboards pop in the first place
You usually notice a baseboard problem only after it shows up as a shadow line, a crack in the caulk, or an actual gap you can slide a credit card into. That movement almost always traces back to a mismatch between how the wall and the trim behave. Wood and MDF expand and contract with temperature and humidity, while drywall and concrete move differently, so any rigid connection that cannot flex will eventually give somewhere along the joint.
Moisture swings are a big driver of that movement. When humidity rises and falls, the wood fibers in your baseboard swell and shrink, which can create cracks, nail pops, and separation if the board is locked too tightly in some spots and barely supported in others. Reporting on Moisture Changes describes how fluctuations in humidity cause wood to expand and contract and links poor installation to cracking and separation along baseboards. Combined with walls that are rarely straight, any weak adhesive bond or sparse nailing pattern gives those boards room to pull away.
Glue is not a substitute for proper fastening
You might be tempted to skip nails and rely on adhesive alone so you do not have to fill holes, especially if you are working in a rental or on painted MDF. That shortcut usually comes back to haunt you, because the glue line is thin, the wall surface is often dusty or slightly bowed, and the baseboard still needs mechanical pressure to stay tight while the adhesive cures. Without solid fastening into studs, the board can creep, twist, or sag as the house moves.
Industry guidance is very clear that you should Attach the baseboards directly to the studs using finishing nails or a brad nailer, with nails placed near the top and bottom of the board for stability. Another professional overview states that Nailing baseboards is the industry standard because it is fast, strong, and allows future removal. Adhesive is best treated as a partner to nails, not a replacement, especially on walls that are out of plane or in rooms where humidity swings are common.
Why generic construction adhesive is not always your friend
When you stand in the aisle staring at rows of tubes, a heavy duty construction adhesive looks like the safest bet for everything. The problem is that many of those products are designed for structural assemblies like subfloors and masonry, not for thin, flexible trim pieces that need a bit of give. If the adhesive cures too rigid or too thick behind a baseboard, it can actually hold the board off the wall in spots and telegraph every bump and hollow in the drywall.
Guidance on Which adhesive to use for baseboards points you toward specific formulations that stay flexible and bond well to both wood and common wall materials. That advice highlights that some construction adhesives are made to grab fast and fill gaps, which makes them perfect for installing baseboards, while others are better suited to large, static assemblies. If you just grab any tube labeled construction adhesive without checking its intended use, you risk creating a bond that is either too brittle or too rubbery for trim, and both extremes can lead to popping as the seasons change.
Wood glue versus Liquid Nails on trim
You might already rely on yellow wood glue for furniture and assume it will perform the same behind your baseboards. Traditional wood glue excels at bonding clean, tight wood joints where both faces are porous and clamped together, but it struggles when one side is painted drywall or when the fit is not perfect. By contrast, a product like Liquid Nails is formulated as a construction adhesive that can handle less precise fits and a mix of materials, which is why many installers reach for it on trim.
A detailed comparison of wood glue vs notes that wood glue is quick, inexpensive, and very strong on wood to wood joints, while Liquid Nails behaves more like a construction grade adhesive that tolerates small gaps and a wider range of substrates. The same source, under the heading Aug, Wood Glue Vs, Liquid Nails, The Complete Pros and Cons, Choosing the, explains that you should choose based on whether you are bonding two pieces of wood or attaching wood to something like drywall or concrete. For baseboards, that means using wood glue at scarf joints or miters where wood meets wood, and relying on a construction adhesive behind the board where it meets the wall.
When specialty trim glues make sense
If you are installing stain grade wood or high end profiles, you may want more control than a generic tube can give you. Specialty products like Titebond Wood Moulding & Trim Glue are formulated to stay where you put them, resist running, and sand or finish cleanly. That kind of behavior matters when you are gluing delicate returns or small pieces that would slide around under a thinner adhesive.
The product description for Titebond Wood Moulding and Trim Glue highlights that Titebond No, Run, Drip Wood Glue is the thickest, fastest drying glue available for use on vertical surfaces, and that it is a no drip, no run wood glue. That makes it ideal for attaching small moulding pieces where you cannot easily clamp and do not want glue squeezing out onto finished faces. You can still pair a trim glue like this with nails into studs, but using it at inside corners, returns, and scarf joints helps those high stress spots stay tight instead of opening up over time.
Choosing adhesives for PVC and composite baseboards
Not every baseboard is wood or MDF. If you are working with PVC or composite trim, you need an adhesive that actually bonds to that plastic rather than just sitting on the surface. Many standard construction adhesives are not optimized for PVC and can peel away under stress, especially in areas that see temperature swings or direct sunlight.
Manufacturers address that gap with products such as Titebond PVC trim adhesive and sealant, which is described as a one component, advanced polymer adhesive sealant designed for a variety of PV applications. That kind of product gives you both adhesion and sealing in a single bead, which is especially helpful at joints and transitions where water could sneak in. If you use a wood focused glue on PVC baseboards instead, you are setting up the installation to fail as the plastic and wall move differently.
How wall quality and movement change your glue choice
Even the best adhesive will struggle if the wall behind your baseboard is wildly out of plane. Few homes have perfectly straight walls and level floors, and that reality means you are often bridging dips and humps with a straight piece of trim. When you rely only on a few blobs of glue in the middle of the board, those high and low spots can telegraph through as gaps once the adhesive cures and the house moves.
Guidance on Few homes having perfectly straight walls explains that slight curves and irregularities can cause trim pieces to shift over time if they are not properly fastened and supported. You can address that by using a continuous bead of adhesive rather than isolated dabs, back beveling the baseboard where the wall bows, and driving nails into every stud to pull the board tight. The glue then acts as a uniform cushion and bond instead of a series of hard spots that encourage the board to flex and pop.
Product labels, cure times, and removal headaches
Every tube in the adhesive aisle carries small print that quietly dictates how your project will go. Open time, full cure time, recommended substrates, and cleanup instructions all affect how you should work and what happens if you ever need to remove those baseboards. If you ignore that information and treat all adhesives as interchangeable, you might press the board back into place too soon, fail to support it long enough, or trap a solvent based product behind sensitive flooring.
When you look up a product online, you will usually see detailed notes on interior or exterior use, compatibility with wood, drywall, and masonry, and whether the cured adhesive stays flexible. Another listing for a multi purpose interior and exterior construction adhesive, for example, spells out that it is designed for a wide range of materials and conditions. Paying attention to those details helps you avoid pairing a brittle adhesive with a moving joint, and it also prepares you for the reality that some cured products are extremely difficult to remove from vinyl flooring and baseboards, as shown in tutorials on removing adhesives from vinyl baseboards.
Putting it all together for baseboards that stay put
Once you understand how your house moves and how each adhesive behaves, you can build a simple, repeatable approach that keeps baseboards from popping. Start by fastening into studs with brad nails or finish nails, use wood glue only where wood meets wood, and choose a construction adhesive that is rated for your wall material and trim type. On PVC or composite boards, reach for a PVC specific adhesive and sealant instead of trying to force a wood product to work.
You can refine that system further by using a no run trim glue on small moulding pieces, as with Titebond No, Run, Drip Wood Glue, and by matching your construction adhesive to the environment, such as a construction adhesive that works for both interior and exterior use. If you stay disciplined about those choices and respect the cure times printed on the label, your baseboards will feel like part of the structure instead of a decorative strip waiting to spring loose.
Like Fix It Homestead’s content? Be sure to follow us.
Here’s more from us:
- I made Joanna Gaines’s Friendsgiving casserole and here is what I would keep
- Pump Shotguns That Jam the Moment You Actually Need Them
- The First 5 Things Guests Notice About Your Living Room at Christmas
- What Caliber Works Best for Groundhogs, Armadillos, and Other Digging Pests?
- Rifles worth keeping by the back door on any rural property
*This article was developed with AI-powered tools and has been carefully reviewed by our editors.