That HGTV shiplap look comes with a cleaning problem nobody talks about
Photo credit: Caia Image/Shutterstock.com
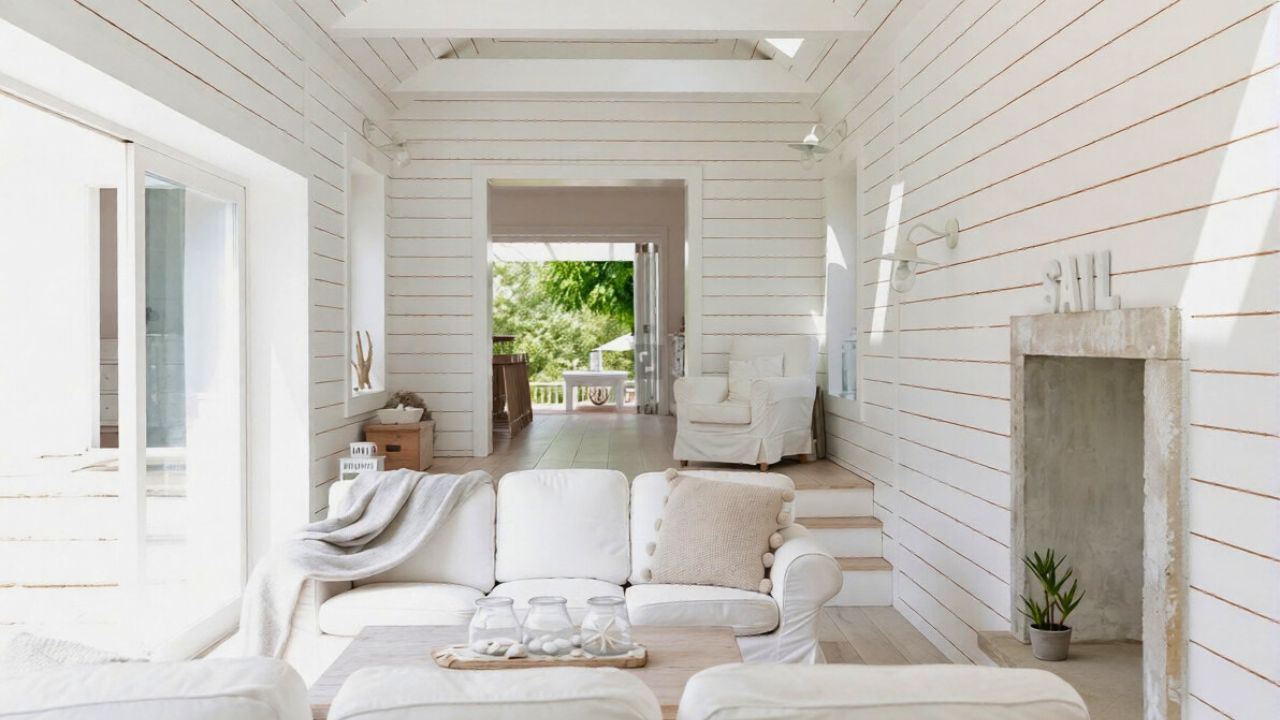
You fall for the clean white lines, the cozy “modern farmhouse” vibe, and the way shiplap instantly makes a builder-basic room look styled. What you do not see on those HGTV reveals is what happens a few months later, when every horizontal ledge has turned into a dust shelf and every gap starts catching grime. That photogenic shiplap look comes with a very real cleaning problem that quietly shifts work onto you long after the cameras are gone.
If you already live with shiplap or you are thinking about adding it, you need a clear picture of how it behaves in a real home, not just on a styled set. Once you understand how the boards are shaped, where dust and moisture actually land, and what it takes to keep them looking crisp, you can decide whether you are signing up for a reasonable routine or a constant battle.
How shiplap’s design turns into a dust magnet
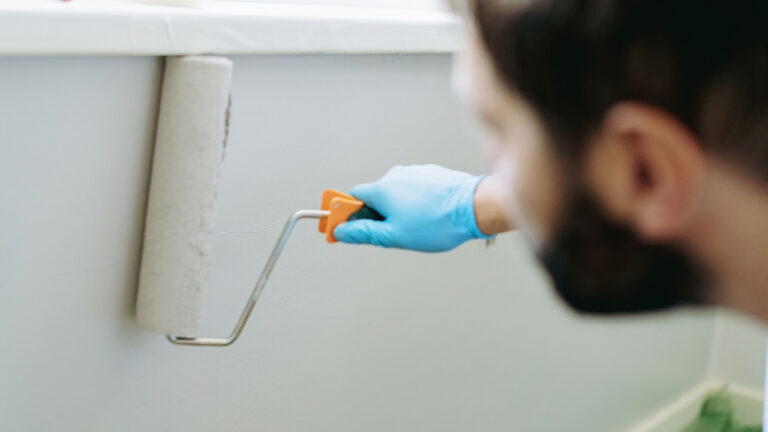
Shiplap is not just “wood on the wall.” It uses long boards with a rabbeted edge that overlap each other, which creates that signature shadow line and subtle gap you see in every farmhouse-style living room. When you install those boards horizontally, each overlap forms a tiny ledge that catches dust, pet hair, and anything floating in the air, especially on interior walls where air from vents and ceiling fans keeps particles moving. One manufacturer describes barnwood shiplap interior as a run of long horizontal planks with small gaps, which is exactly the geometry that gives dust a place to settle.
Those gaps and ledges are part of what makes shiplap so visually appealing, but they also make it fundamentally different from a flat drywall surface. Where a painted wall lets dust slide down or get wiped off in one pass, shiplap breaks the surface into dozens of tiny horizontal and vertical edges. You end up with more linear feet of surface to clean, and the grooves themselves act like channels that trap fine debris. When you see a styled photo where every board looks flawless, you are looking at a wall that has either just been installed, freshly painted, or carefully cleaned, not what you will face after a season of open windows or a winter of forced-air heat.
The HGTV fantasy versus your weekly reality
On makeover shows, shiplap often appears in a time-lapse montage, going from bare studs to pristine white planks in a few seconds. What you do not see is the ongoing maintenance that comes with those horizontal boards once the crew leaves. Real-world guidance on cleaning tips for points out that since shiplap boards are installed horizontally, they naturally gather dust on their ledges, which means you are signing up for regular attention, not a set-it-and-forget-it finish.
That gap between boards, which looks so good on camera, becomes a recurring task in your weekly or biweekly cleaning routine. Instead of wiping a wall in a few quick passes, you find yourself chasing lines of dust across every seam. Over time, those faint shadows that read as “character” on TV start to look more like dirt in person, especially in high-traffic spaces like entryways and family rooms. The fantasy is a crisp white backdrop that always looks styled; the reality is that you either dust those grooves often or learn to live with a faint gray outline on every board.
Why the grooves are so hard to keep clean
The problem is not just that shiplap collects dust, it is that the grooves make that dust stubborn. The overlapping profile that creates the shadow line also creates a small recess that a flat cloth or sponge cannot fully reach. Guidance on what is the stresses that you need tools that can actually get into those spaces, not just skim the surface, because the tiny ledge at each overlap traps particles that a standard wipe leaves behind.
That recessed design is exactly what gives shiplap its character, which means you cannot simply caulk everything flat without changing the look you paid for. Exterior shiplap siding has the same issue at a larger scale, where deep grooves give it a signature profile but also make it harder to keep clean. One breakdown of the cons of shiplap notes that a lot of homeowners find those grooves very hard to keep clean, and that same geometry exists on your interior walls, just in a more controlled environment.
The hidden time cost of maintaining that “fresh paint” look
Once you understand how the grooves behave, the real cost of shiplap becomes time. A flat wall might need a quick dusting once in a while, but shiplap often demands a more deliberate routine. Advice on potential cons before recommends making it a habit to dust the grooves frequently to prevent dust and grime from building up, which means you are committing to an extra step every time you clean the room.
That extra step is not trivial when you scale it across a whole house. Each wall becomes a grid of horizontal lines you have to follow with a microfiber cloth, vacuum brush, or soft duster, and ceilings or tall accent walls may require a ladder or an extendable tool. If you skip a week, the dust that settles in the gaps can mix with humidity from showers or cooking and start to cling more firmly, which then requires more scrubbing and more risk to the finish. What looks like a simple paint-and-plank project on television quietly turns into a recurring chore that competes with everything else on your to-do list.
What professionals say you actually have to do
When you look at how manufacturers and cleaning pros tell you to care for shiplap, the routine is more involved than a quick wipe. One detailed guide on what is the breaks the process into steps that start with dusting, then move to a soft cloth with mild soap or wood cleaner, and finally address stuck-on grime in the gaps. You are encouraged to use gentle motions so you do not damage the finish, which slows you down compared with scrubbing a standard wall.
Other wood specialists frame shiplap care as its own category. One guide titled shiplap care 101 explains how to keep your shiplap walls looking great by using mild soap or specialized wood cleaner and by paying attention to the spaces between the boards. You are advised to work along the length of each plank, not across multiple boards at once, so you do not drive dirt into the seams. That kind of methodical cleaning is effective, but it is also a reminder that you are caring for a finish that behaves more like furniture than like drywall.
Social media hacks versus long-term habits
Because shiplap has become such a visual trend, you see it constantly on Instagram and Pinterest, often paired with quick cleaning “hacks.” One interior designer named Melissa, who shares a clip labeled SAVE THIS! quick, suggests using a particular tool and motion to keep painted shiplap looking sharp. Those tips can help you move faster, especially if you use a soft brush attachment on a vacuum or a microfiber duster that fits into the grooves, but they still depend on you doing the work regularly.
Behind those polished reels and pins, the reality is that hacks do not replace habits. A clever trick might shave a few minutes off your routine, yet the underlying geometry of shiplap does not change. Social platforms are full of shiplap inspiration boards that celebrate the look, but if you want those images to match your own walls month after month, you still need to plan for consistent, hands-on maintenance.
Bathrooms, condensation and the moisture trap problem
Shiplap in bathrooms has its own layer of complication. In online groups where people trade DIY farmhouse ideas, you see threads like bathroom shiplap: yay, where members such as Meagan Hughes and Reynaldo Mozo share that they have it in a rental bathroom and love it, while others like Kendra Small warn that if it is not installed correctly, it can be harder to clean. The concern is not only dust; it is condensation from showers that can settle into grooves, soften paint, and invite mildew if the boards or finish are not moisture resistant.
Specialists who focus on wood walls in wet spaces recommend treating bathroom shiplap differently from what you might put in a dry living room. One guide on how to waterproof suggests that you choose moisture resistant shiplap, avoid areas that get direct splashes, and seal the surface properly. Even with those precautions, you still need to wipe down condensation and keep air moving so moisture does not linger in the gaps. That adds yet another layer of cleaning to a room that already demands more attention than most.
How shiplap compares with beadboard and plain drywall
If you are still deciding between shiplap and other wall treatments, the cleaning difference is a key part of the equation. When you compare beadboard versus shiplap, the vertical grooves of beadboard can shed dust differently from the horizontal lines of shiplap. Guidance on beadboard vs shiplap notes that since shiplap boards are installed horizontally, they tend to gather dust on their ledges, which makes them more demanding to maintain than a smooth surface or even some vertical paneling.
Plain painted drywall, by contrast, has almost no geometry for dust to cling to. You can vacuum or wipe it quickly, and there are no overlapping edges where grime can settle. Wainscoting styles that keep profiles shallow, such as some of the options described in all about wainscoting, may give you architectural interest without as many dust-catching recesses. If you love the cottage look but dread the idea of cleaning dozens of tiny shelves, beadboard or simple trim might give you enough texture with a bit less maintenance than full-height shiplap on every wall.
Practical ways to live with shiplap without resenting it
If you already have shiplap, you are not stuck choosing between constant frustration and a full remodel. You can adjust your cleaning tools, your schedule, and even your installation choices for future projects to make the look more manageable. Cleaning guides that explain what is shiplap point out that its unique design gives dust plenty of places to get trapped, but they also suggest using a vacuum with a soft brush attachment, a microfiber cloth, and mild cleaners so you can clear debris without damaging the finish.
You can also be strategic about where and how you use shiplap. Limiting it to one accent wall instead of wrapping an entire room cuts your cleaning time dramatically. Choosing prefinished boards from companies like from the forest or similar suppliers can give you surfaces that are sealed more evenly, which makes wiping easier. When you do clean, working from top to bottom and pairing a quick weekly dusting with a deeper wipe-down every month or two keeps buildup under control. That way, you get the character you wanted from the beginning without letting those charming grooves quietly run your weekends.
Like Fix It Homestead’s content? Be sure to follow us.
Here’s more from us:
- I made Joanna Gaines’s Friendsgiving casserole and here is what I would keep
- Pump Shotguns That Jam the Moment You Actually Need Them
- The First 5 Things Guests Notice About Your Living Room at Christmas
- What Caliber Works Best for Groundhogs, Armadillos, and Other Digging Pests?
- Rifles worth keeping by the back door on any rural property
*This article was developed with AI-powered tools and has been carefully reviewed by our editors.