The ceiling stain you should never paint over without doing this first
Photo credit: Japans Fireworks/Shutterstock.com
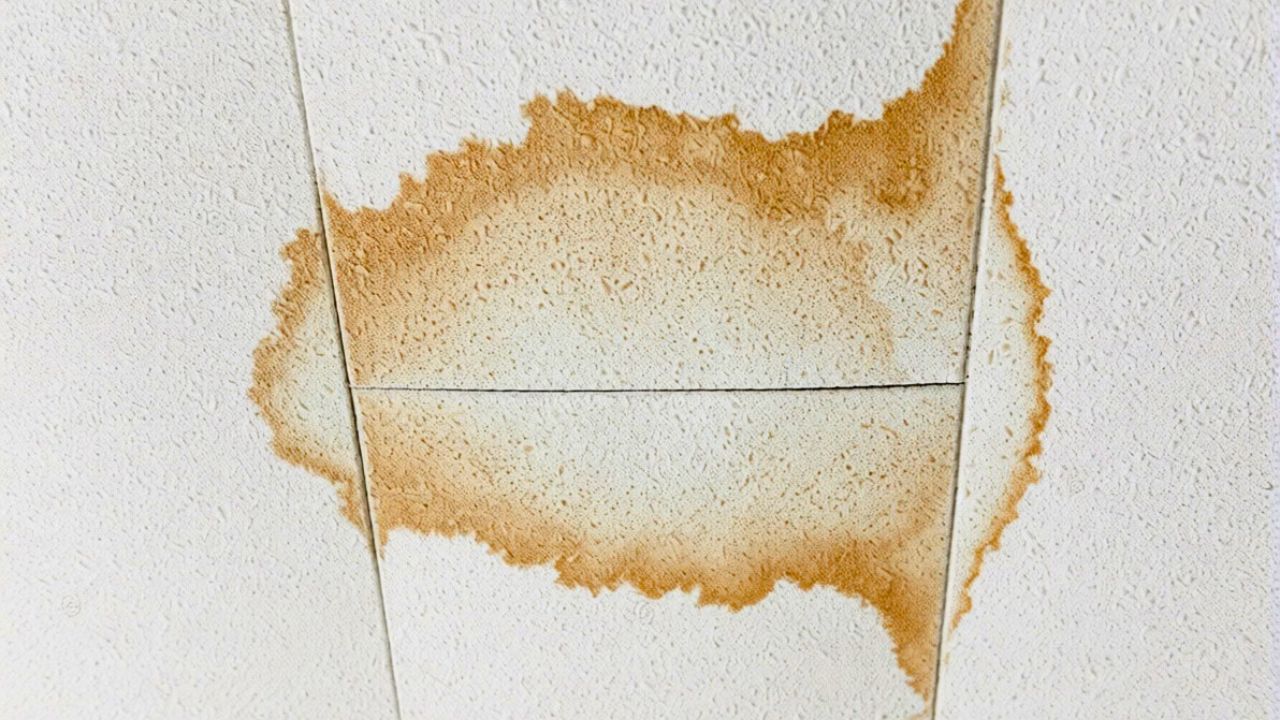
You might look at a yellow halo on your ceiling and see a quick weekend paint job. In reality, that stain is a warning light you should never ignore, and grabbing a roller before you investigate can lock in moisture, mold, and hidden damage. If you deal with the source, clean, and seal the mark properly first, you give your new paint a real chance to last instead of watching the stain bleed straight back through.
Treating that discolored patch as a symptom instead of a cosmetic flaw protects your ceiling, your budget, and your health. It also saves you from the frustration of repainting the same area over and over because the underlying problem was never fixed.
Why that ceiling stain is more than an eyesore
When you see a brown or yellow ring overhead, you are usually looking at dried minerals, tannins, or contaminants carried by water that has already traveled through your building materials. You might notice a patch that is roughly 1.5 feet by 0.5 feet across, or a cluster of smaller marks, but the size is less important than what they represent: water that has already found a path into your home. Professional guidance on Some time ago, homeowners were advised that these stains often trace back to leaks from bathrooms, roofs, or plumbing lines, and that you should treat them as a sign of a system problem, not just a paint failure.
Water stains also carry risks that go beyond appearance. One expert explanation makes it clear that Water stains are discoloration; they can signal mold growth or weakened building materials if you leave them alone. Simply covering them with a fresh coat of white may trap moisture against drywall or plaster, where it can quietly soften joists, corrode fasteners, and feed spores that affect indoor air quality.
The one step you must take before any paint touch up
Before you even think about primer or finish coats, you need to track down and correct the source of the leak. A detailed how-to guide on ceiling repairs spells this out directly in Step 1: Identify, and it does not move on to brushes or rollers until that job is done. You might be dealing with a failed wax ring under an upstairs toilet, a cracked roof tile above a bedroom, or a loose fitting in a supply line; in every case, any paint you apply before the repair will be wasted.
Once the leak is corrected and the area has had time to dry, you can safely start thinking about finishes. Skipping this step almost guarantees you will see the same brown shadow reappear in a few weeks, just as one repair video warns that water stains ifust paint without sealing and fixing the cause, the mark will show again. Treat the repair as the foundation and the paint as the final detail, not the other way around.
How to read the stain and decide your next move
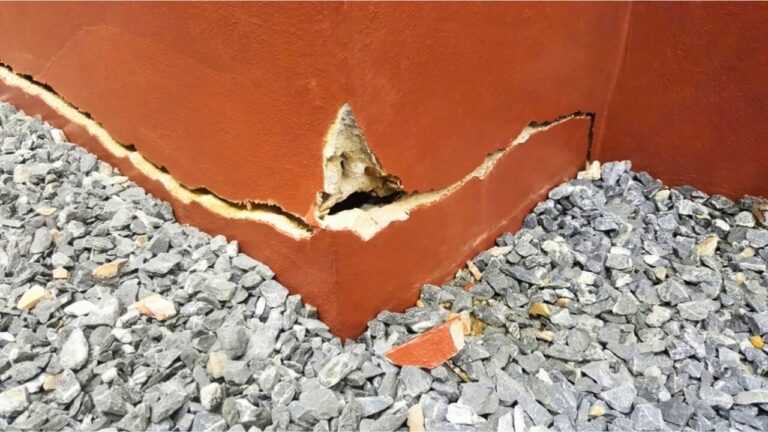
You can learn a lot by studying the shape, color, and texture of the stain before you start. A soft, diffuse yellow halo often points to an older, dried leak from clean water, while a darker brown patch with irregular edges can indicate ongoing moisture or contaminants from a roof or plumbing issue. Guidance on How to Remove explains that acting quickly when a mark is fresh helps you limit its spread, which means you should not wait months to investigate a new ring that appears after a storm or shower.
Texture also matters. If the surface feels spongy, crumbles when you touch it, or shows hairline cracks, you may have to cut out and replace damaged drywall rather than just prime and paint. A restoration guide on how to Painting over a stresses that stains can telegraph back through new coatings if you do not treat them correctly, which is even more likely if the substrate is compromised. Use your inspection to decide whether you are dealing with a cosmetic fix or a small demolition and patching job.
Gather the right materials before you climb the ladder
Once you know the leak is fixed and the surface is sound, assemble your tools in one trip rather than climbing up and down repeatedly. A professional checklist for how to Gather the Right recommends stain-blocking primer, bleach for washing away mold or mildew, and basic painting supplies. You will also want a sturdy step ladder, drop cloths, safety goggles, and a respirator or at least a quality mask if you are working in a small bathroom or suspect any mold.
For the primer itself, you have a few choices. Many pros reach for shellac or oil-based stain blockers because they seal in tannins and water marks more aggressively than standard acrylic products. One homeowner in a forum thread insisted that you should use Definitely BIN Shellac first and warned that otherwise you are wasting your time, noting that a similar application in a garage still looked great about 5 years later. You can also find specialized ceiling stain kits sold as a bundled product that includes matching touch up paint.
Clean and disinfect the stain so you are not sealing in trouble
Before you reach for primer, wash the stained area so you are not trapping dirt, smoke residue, or mildew under a fresh coating. A home improvement expert advises you to Clean the stains before applying any primer or paint by using a mixture of water and mild detergent, then rinsing and letting the surface dry. If you see any gray or black spotting, especially in a bathroom or around an HVAC register, you should add a disinfecting step with a diluted bleach solution to kill mold spores.
Restoration specialists recommend that you use bleach carefully and avoid saturating the ceiling. One guide on how to Instead, dab to the surface suggests you blot rather than scrub aggressively so you do not break down the paper face of drywall or the finish on plaster. After cleaning, give the area plenty of time to dry, ideally overnight, so that your primer can bond properly and you are not trapping moisture under a sealed layer.
Seal the stain with the right primer, not regular paint
Once the surface is dry and sound, you are ready for the step that makes or breaks the project: sealing the mark with a dedicated stain-blocking primer. Regular ceiling paint is designed for color and sheen, not for blocking tannins or water marks, which is why many people see the same brown circle reappear after a few days. A detailed Q and A on Mar guidance explains that oil-based primers are best for stubborn stains because they create a barrier that water-soluble discoloration cannot penetrate.
If you are working over wood trim near the ceiling, the same logic applies. A painting specialist notes that you can sand with 120 and 150 grit, then finish with 120, 150, 220 for a very smooth surface, then prime the wood with a stain-killing primer before you add latex paint. For the ceiling itself, you can choose a white-tinted stain blocker that doubles as a base coat, or a clear sealer if you plan to match a specific color. The key is full coverage over and slightly beyond the stain, often with two light coats, so the discoloration is completely locked in before you move on to finish paint.
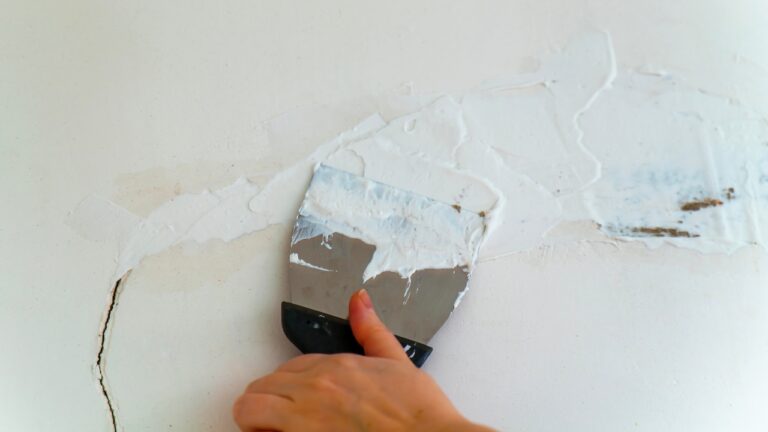
Blend the repair so the ceiling looks uniform
After the primer dries, you can finally apply your ceiling paint, but you still need a strategy to avoid a visible patch. If the stain was small, you might be tempted to roll a tight square over the spot, although that often leaves a flashing effect where the sheen or texture does not quite match. Some repair videos that show How to Paint recommend feathering your strokes well beyond the primed area so the transition is gradual rather than abrupt.
For larger stains, especially in main living spaces, you may decide to repaint the entire ceiling for a seamless look. You can use a dedicated ceiling white or a color-matched finish from a modern product line so the repaired section disappears entirely. Take your time cutting in along the edges and maintain a wet edge as you roll so you do not create lap marks that draw attention back to the area you just fixed.
When you should call in a pro instead of DIY
Not every ceiling stain is a simple weekend project, and part of protecting your home is knowing when to step back. If you see multiple stains across different rooms, sagging drywall, or signs of mold spreading beyond the original mark, you may be dealing with a larger roof or plumbing failure that needs professional assessment. One restoration-focused guide that includes an Image provided by explains that widespread staining can indicate systemic moisture problems that affect insulation, framing, and even electrical runs, which is not something you should handle alone.
Think about expert help as well if you are not comfortable working at height or if the stained area is above a staircase or vaulted space where ladder placement is tricky. In those cases, hiring a painter or restoration contractor who already has scaffolding, safety gear, and experience can cost less than a medical bill or a second repair. If you want to learn more about best practices before you decide, you can follow industry conversations through channels that Discovered How Address and share ongoing tips on moisture control and finish work.
Keep future stains from returning
Once you have invested the time to fix, clean, and repaint a stained ceiling, make a habit of preventing the same problem from coming back. That starts with regular inspections of the areas that most often cause leaks, such as bathrooms, attics, and roofs. A DIY guide that you might find through Discovered How Paint emphasizes checking for loose tiles, clogged gutters, and failed caulk around tubs and showers so you catch small issues before they turn into overhead stains.
You can also improve ventilation in moisture-heavy rooms by using exhaust fans, opening windows when weather allows, and keeping HVAC filters clean so air circulates freely. If you have already dealt with a major leak, consider documenting the repair and keeping a small amount of leftover primer and paint labeled for that room, stored safely away from children and heat sources. That way, if you ever see a faint mark reappear, you can quickly confirm whether it is a new problem or just a minor touch up, using the same Discovered How Paint techniques that worked the first time.
Like Fix It Homestead’s content? Be sure to follow us.
Here’s more from us:
- I made Joanna Gaines’s Friendsgiving casserole and here is what I would keep
- Pump Shotguns That Jam the Moment You Actually Need Them
- The First 5 Things Guests Notice About Your Living Room at Christmas
- What Caliber Works Best for Groundhogs, Armadillos, and Other Digging Pests?
- Rifles worth keeping by the back door on any rural property
*This article was developed with AI-powered tools and has been carefully reviewed by our editors.