The GFCI detail homeowners mess up in older kitchens
In older kitchens, the detail that quietly undermines many safety upgrades is not the GFCI device itself, but how you connect it. You can buy the right outlet, install it neatly in the backsplash, and still leave the rest of the circuit unprotected if you mis-handle the “line” and “load” terminals. That single wiring choice determines whether you have a true safety net or a decorative button that only guards one spot.
When you layer that mistake on top of aging wiring, shallow metal boxes, and three‑prong outlets with no real ground, you get a kitchen that looks modern but behaves like it is still in the 1970s. Understanding how GFCI protection is supposed to work, and how older layouts complicate it, lets you correct the problem once instead of chasing nuisance trips and mystery dead outlets for years.
The real job of a GFCI in an older kitchen
A ground‑fault circuit interrupter is not there to “fix” bad wiring, it is there to shut power off fast when current starts leaking away from the intended path. In a kitchen full of metal sinks, damp countertops, and appliances with long cords, that fast reaction is what stands between a minor tingle and a serious shock. The device constantly compares the current on the hot and neutral conductors, and if even a small difference appears, it trips and cuts power in a fraction of a second.
Modern code expects that protection to cover every receptacle serving a countertop, not just the one with the buttons. Guidance for homeowners makes it clear that all outlets that serve kitchen countertop surfaces should have GFCI protection, including those on an island or on the opposite side of the room. In an older kitchen, that usually means using one or two GFCI devices to protect a string of standard receptacles downstream, which is exactly where the line versus load decision becomes critical.
The line vs. load mistake almost everyone makes
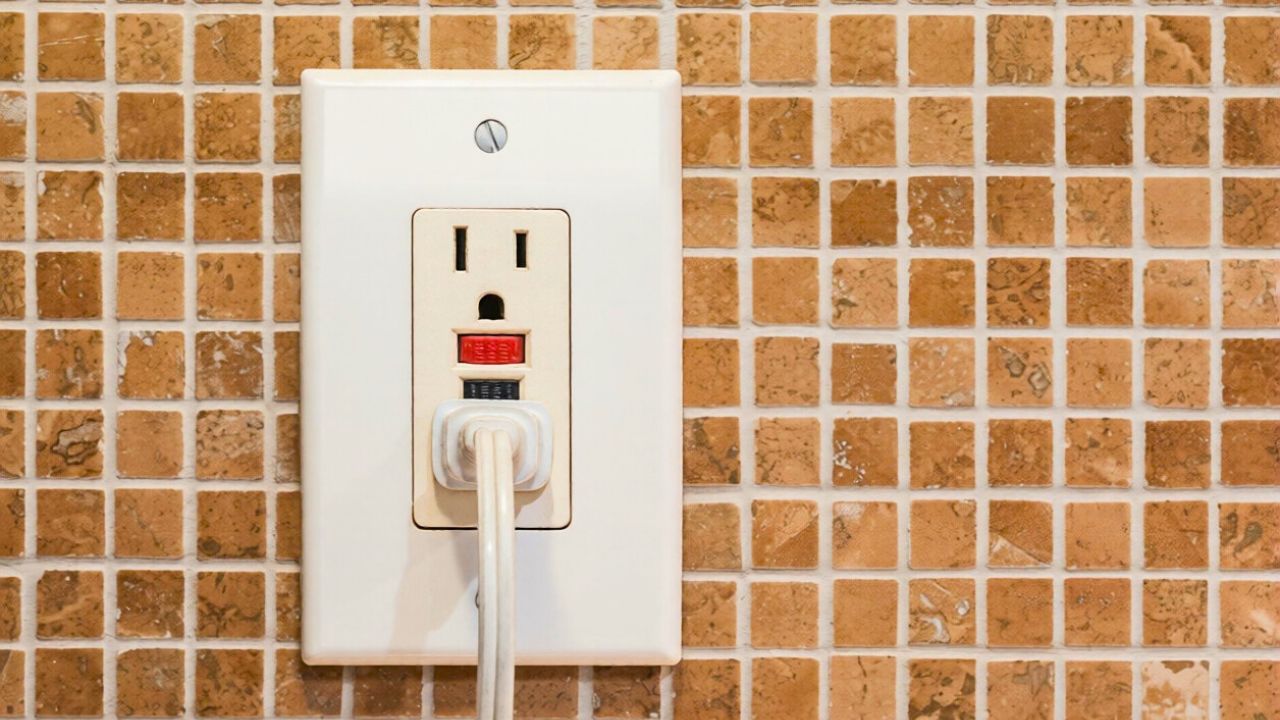
On a GFCI receptacle, the “line” terminals are meant for the incoming power feed, and the “load” terminals are optional outputs that extend protection to other outlets. If you reverse them, the device may still power up and even test correctly at its own face, but the rest of the circuit will not be protected the way you think. In some cases, the outlet will not reset at all, which leads homeowners to assume the device is defective when the real problem is the wiring order.
In a detailed walk‑through, Blair Gilbert from Gilbert Pro Hardware in St clair Shores shows how often this mistake happens when people replace a standard receptacle with a GFCI in an existing box. The old outlet may have multiple cables landed under the same screws, and if you simply move wires over without identifying which cable is the feed, you can end up putting the supply on the load side. That error is especially common in older kitchens where circuits were extended over time and labeling in the panel is vague or missing.
Why older kitchens are uniquely vulnerable
Many kitchens built before the 1990s were wired long before anyone expected countertop outlets to be GFCI protected. You may find a single small appliance circuit feeding half the room, or a refrigerator sharing a circuit with a toaster and microwave. When you retrofit one or two GFCI devices into that patchwork, every hidden junction box and spliced cable becomes a potential point where line and load can be confused or where a downstream outlet is accidentally left unprotected.
Inspectors and electricians regularly encounter three‑prong receptacles in older homes that have no equipment ground at all, especially in additions from the 1940s and 1950s. One homeowner describing a 1949 addition noted that there was only hot and neutral wiring, and that many three‑prong outlets were simply tied into that two‑wire system without a ground, leaving them looking safe but functionally compromised, and that There were multiple such receptacles. In that context, a GFCI is often the only realistic layer of protection you can add without rewiring the entire kitchen, which makes getting its connections right even more important.
What current code actually expects around your sink
Even if your house predates modern electrical rules, any new work you do in the kitchen is judged against today’s standards. Those standards focus heavily on the area around the sink, where water and electricity are most likely to meet. The requirement is not limited to the backsplash; it extends to outlets under the sink, behind the refrigerator, or tucked beside a dishwasher if they are within a set distance of the basin.
Training material that walks through section 210.8(A)(7) of the National Electrical Code explains that receptacles within a specified distance of any sink in a dwelling, including the kitchen sink, must have GFCI protection even if they are under the sink or behind the refrigerator. In an older kitchen, that often means the under‑sink disposal outlet and the refrigerator receptacle need to be on the load side of a properly wired GFCI, or protected by a GFCI breaker, rather than left on an unprotected leg of the circuit simply because they are out of sight.
How one GFCI can (correctly) protect a whole countertop
If you sort out the line and load correctly, a single GFCI can legitimately protect several standard receptacles downstream. That is often the cleanest way to retrofit an older backsplash without replacing every device. The key is to identify which cable brings power from the panel and which cable continues on to the next outlet, then land the feed on the line terminals and the outgoing conductors on the load terminals so the protection cascades.
Homeowner guidance on kitchen circuits notes that all outlets serving countertop surfaces should be on GFCI protection, and that this can be achieved by feeding multiple receptacles from a single protected device. A separate explanation of kitchen wiring points out that pretty much all kitchen circuits are now expected to be GFCI protected, and that this is often accomplished by placing one device at the start of the run so that when it trips, it cuts power to all the outlets downstream, which is why a tripped GFCI can leave half your countertop dead until you reset it at the source Pretty reliably.
Why your new GFCI keeps tripping for “no reason”
Once you do get the wiring order right, older kitchens can still punish you with nuisance trips that seem random. The culprit is often leakage current from multiple appliances sharing the same protected circuit. Each device may leak only a tiny amount, but together they can nudge the GFCI past its threshold, especially when motors start or heating elements cycle on and off.
Technical guidance on troubleshooting explains that GFCI Trips on GFCI protected circuits can be caused by leakage current, and that When many pieces of equipment are plugged into the same run, their combined leakage can cause a GFCI to trip randomly. In a retrofit kitchen, that might mean a coffee maker, toaster oven, and microwave all sharing one device, so the fix is not to bypass the protection but to redistribute loads across circuits or move high‑leakage appliances to a different protected branch.
The hidden challenge of old boxes and tight spaces
Even when you understand line and load, older metal boxes can make a proper installation physically difficult. GFCI devices are bulkier than standard receptacles, and when you add stiff older conductors, wirenuts, and possibly a grounding pigtail, the result can be a device that simply will not sit flush. Homeowners often respond by cramming everything in and forcing the device into place, which risks loosening connections or damaging insulation.
One homeowner describing a retrofit in a 1983 house said that replacing old kitchen sockets with GFCI devices turned into a nightmare to reseat because the boxes were shallow and the existing wiring was short, and that There was barely enough slack to work with. Another detailed answer on a do‑it‑yourself forum notes that the first problem in older homes is often that the GFCI will not fit in the existing metal box at all, and that the usual solution is to extract the old box surgically by cutting the mounting nails and replacing it with a larger one where no other option exists Nov if you want a safe, code‑compliant result.
Testing, labeling, and living with your upgraded circuit
Once the devices are in place, you still need to verify that protection actually extends where you think it does. That starts with using the built‑in buttons on the GFCI itself, then confirming that downstream outlets lose power when the device trips. It is a simple ritual that many homeowners skip, which is how unprotected outlets linger for years after a cosmetic upgrade.
Electricians recommend that you Press the Test Button on the GFCI, and that Once you do, Doing so should immediately cut off power to anything plugged into that device and any outlets on its load side. In an older kitchen, you should walk the room with a small lamp or plug‑in tester while the GFCI is tripped, then label the device cover with a simple note like “Protects all counter outlets on this wall” so you and future owners know which receptacles depend on that one reset button.
When to stop and call a professional
There is a point in many older kitchens where the tangle of splices, mixed cable types, and mystery junctions stops being a weekend project and becomes a safety risk. If you open a box and find scorched insulation, aluminum conductors, or more than two cables crammed behind a single device, you are looking at a system that may need more than a GFCI swap. At that stage, the smartest move is to bring in a licensed electrician who can trace the circuit, separate loads, and, if necessary, run new home runs back to the panel.
Professional installers who teach homeowners how to replace a GFCI emphasize that receptacles differ from a standard receptacle because when you are wiring it you must decide whether to connect additional conductors to the load terminals, and that this choice affects every downstream outlet Jan in the chain. Contractor groups that share weekly tips on social media remind you that the outlets with test and reset buttons are part of a broader safety strategy, and that a CONTRACTOR TIP THE WEEK on Electrical Hopefully will stress that if you are not fully confident identifying line and load, or if your kitchen wiring predates modern grounding, it is time to let a professional finish the job rather than gambling with a half‑protected circuit.
Like Fix It Homestead’s content? Be sure to follow us.
Here’s more from us:
- I made Joanna Gaines’s Friendsgiving casserole and here is what I would keep
- Pump Shotguns That Jam the Moment You Actually Need Them
- The First 5 Things Guests Notice About Your Living Room at Christmas
- What Caliber Works Best for Groundhogs, Armadillos, and Other Digging Pests?
- Rifles worth keeping by the back door on any rural property
*This article was developed with AI-powered tools and has been carefully reviewed by our editors.