The window caulk line that tells everyone it was a DIY job
Photo credit: Vershinin89/Shutterstock.com
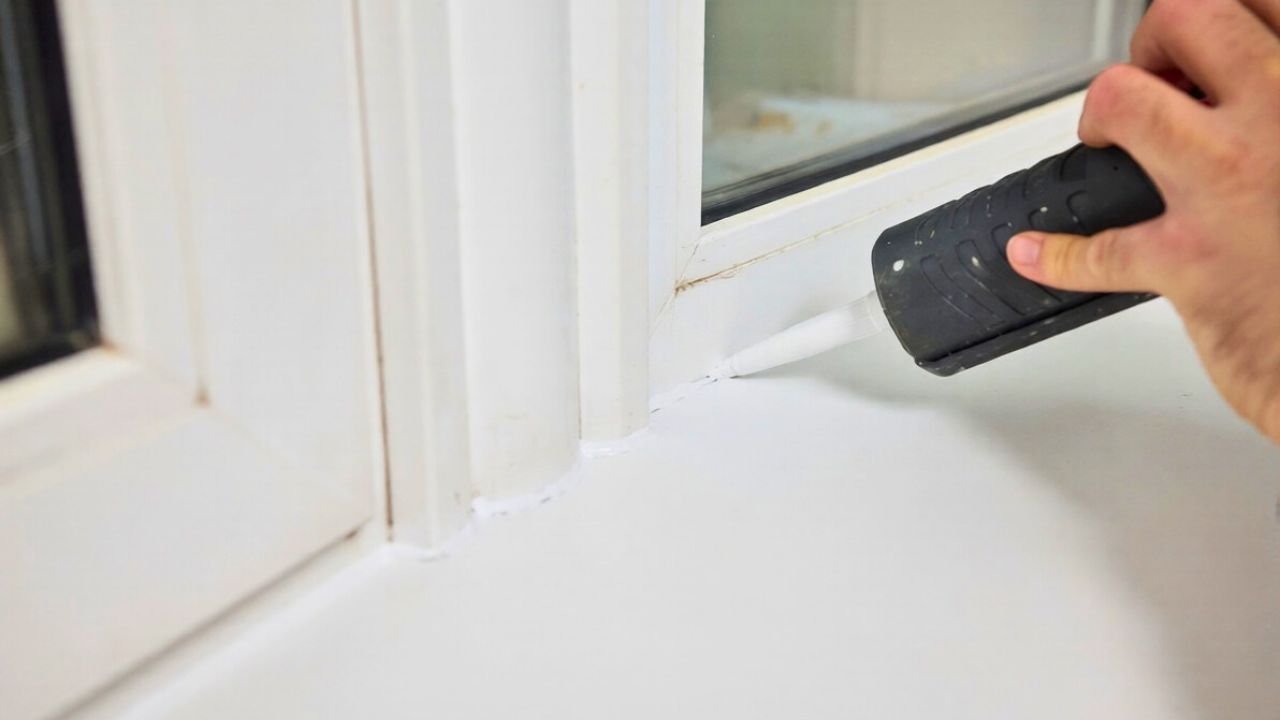
The line of caulk around a window quietly announces whether you knew what you were doing. A clean, consistent bead suggests professional care, while a wavy, smeared, or cracked line instantly reads as a weekend experiment. To make your next project look like it came from a seasoned installer rather than a rushed DIY session, you need to understand exactly what gives that away and how to fix it.
The telltale DIY caulk line
You can usually spot a do-it-yourself window by the caulk alone. The bead may wander up and down instead of following a straight path, or it may balloon in some spots and flatten in others. Gaps, pinholes, and visible air bubbles catch the light and make the joint look messy, and any dried smears on the glass or siding frame the entire window with a halo of mistakes. Even if the window itself is plumb and level, that irregular edge pulls the eye and signals that you rushed the finishing stage.
Those flaws matter as much as the appearance. An uneven bead often hides voids where drafts and moisture can slip behind the trim, and thick blobs tend to crack or separate as the building moves. When you see a window with a lumpy perimeter and hardened ridges where someone wiped with a dry finger, you are also seeing places where water can creep into the wall. That is why professional installers treat the caulk line as a performance detail, not just a cosmetic flourish, and why you need to look beyond “close enough” if you want a window that actually stays sealed.
Why that messy bead is more than a cosmetic issue
A sloppy caulk job does more than irritate you every time you walk past the window. If the bead does not bond properly on both sides of the joint, air and water can bypass the seal, raising your energy bills and inviting rot into the framing. Tutorials that show you how to caulk a window, such as basic how-to videos, emphasize that caulk creates a watertight barrier that keeps out drafts and moisture. When that barrier is thin in some areas and piled up in others, it moves unpredictably with temperature changes and can peel away from the surface.
Over time, those failures show up as peeling paint, soft spots in trim, and fogged glass where condensation finds its way into the assembly. You may also see insects using tiny gaps as entry points. A clean, continuous bead with proper adhesion on both sides behaves like a flexible gasket that stretches and compresses without breaking. When you treat the caulk line as a structural component rather than a decorative touch, you start to understand why professionals obsess over its shape, thickness, and contact with the substrate.
Preparation: where DIY jobs go wrong first
The most common reason your caulk line looks amateur is that you start applying it before the surface is ready. Old, cracked sealant, flaking paint, and dust prevent new material from bonding, so the bead skates over debris instead of gripping the window frame and siding. Guidance on crisp, clean caulk stresses that you should remove the old sealant completely, cut it out with a knife, and scrape until you have bare, stable material on both sides of the joint. If you leave even a thin film of failed caulk, the new bead can separate along that weak layer.
Moisture is another quiet saboteur. When you apply sealant to damp wood or dusty siding, it may stick in the moment but release as soon as the surface dries or moves. Advice on dirty or wet makes clear that sealants bond best to clean, dry, and stable substrates, and that dust, manufacturing oils, and moisture all interfere with adhesion. If you want your caulk line to look straight and stay that way, you need to spend more time with a scraper, vacuum, and clean rag than with the tube itself.
Control starts with the tube and nozzle
Another giveaway that you handled the job yourself is a bead that looks sprayed on rather than shaped. That usually starts with cutting the nozzle too far back, which creates a large opening that dumps more material than you can control. Instructions on cutting the nozzle recommend trimming only the tip at a modest angle so you can control the flow and keep the bead shaped instead of splattered. When you slice too deep, you are forced to move faster than your hand can track, and the line starts to snake.
How you handle the trigger matters just as much. Professional tips on smooth and even warn that one common mistake is applying too much caulk at once, which leads to a lumpy or uneven appearance, and another is inconsistent pressure on the gun. If you squeeze hard at the start and relax as you move, the bead will taper off and leave thin spots that you try to fix by going back over them. Instead, aim for a steady, moderate squeeze and a slow, consistent pull along the joint so the bead forms in one continuous pass.
Application technique: how pros keep the line straight
Once the nozzle is set, your hand technique separates a clean line from a wobbly one. Experienced installers keep the tip of the tube at a constant angle, usually around 45 degrees, and move at a pace that lets the bead ride directly in the corner between frame and siding. Guidance on window trim work explains that you should start at one end and move steadily to the other while maintaining consistent pressure, which helps create a uniform bead of caulk. When you stop and start in the middle, you leave visible joints that are hard to hide during tooling.
You also need to think about how the building moves. Advice on window caulking mistakes points out that you should consider moving components such as sashes and doors so you do not bridge gaps that need to open and close. If you run a thick bead across a joint that is meant to slide, the caulk can tear the first time you operate the window, leaving ragged edges that scream “DIY.” A professional-looking line respects those movement joints, sealing where the manufacturer intended and leaving clearance where parts need to move.
Smoothing the bead without smearing the glass
Even if your application is careful, the bead will not look finished until you tool it. This is where many DIY projects go visibly wrong, with fingers dragging caulk across the glass or siding and leaving wide, shiny smears. Guidance that explains how to smooth the caulk recommends starting at one end and moving steadily to the other while maintaining consistent pressure on your tooling finger or tool. That steady pass compresses the bead into the joint and feathers the edges without pulling material out of place.
If you rush or change direction midstream, you create ripples and ridges that dry into permanent imperfections. Some installers lightly mist the surface or use a dedicated caulk tool to avoid sticking, but the principle remains the same: you want one clean, continuous motion. When you see a window with narrow, even fillets of sealant and no residue on the glass, you are looking at a line that was applied with care and then shaped with just enough pressure to seat it without flattening it.
Common DIY mistakes that shout “home project”
Certain errors show up so often that they have become a visual shorthand for amateur work. One is running multiple passes over the same joint, which piles fresh caulk on partially skinned material and creates a rope-like texture. Professional guidance on common mistakes highlights that applying too much caulk at once leads to a lumpy or uneven appearance, and that you should instead aim for a single, controlled bead that needs only light tooling. Another frequent misstep is leaving gaps at the corners where two runs meet, which immediately draw attention when the light hits them.
Surface prep missteps are just as telling. Advice on common mistakes to notes that one of the most frequent errors is failing to prepare the surface properly, either by skipping the removal of old caulk or neglecting to clean the area thoroughly. When you see new sealant smeared over mildew, paint flakes, or crumbling putty, you can safely assume the project did not follow best practices. Those shortcuts might seem invisible on day one, but as the bead pulls away or discolors, they become a permanent advertisement for inexperience.
Learning from pro demonstrations and tutorials
If you want your next caulk line to look less like a first attempt, study how professionals move. Instructional clips that walk through window caulking step by step show you how slowly the gun actually travels, how the nozzle stays in contact with the joint, and how little material is needed when the surfaces are prepared correctly. Another video that demonstrates silicone around a after installation lets you watch the sequence from cleaning to final tooling so you can match the rhythm rather than guessing at it.
Written guides support those visuals by breaking down each stage into clear tasks. When you read through detailed mistake lists, you see how small decisions, such as accounting for moving components or choosing the right sealant for the substrate, shape the final result. Similarly, broader how-to resources on window trim like and clean caulk lines help you build a repeatable process. Combined with patient practice, that process turns the line around your windows from a “DIY experiment” into a quiet match for the standard of the rest of your home.
Like Fix It Homestead’s content? Be sure to follow us.
Here’s more from us:
- I made Joanna Gaines’s Friendsgiving casserole and here is what I would keep
- Pump Shotguns That Jam the Moment You Actually Need Them
- The First 5 Things Guests Notice About Your Living Room at Christmas
- What Caliber Works Best for Groundhogs, Armadillos, and Other Digging Pests?
- Rifles worth keeping by the back door on any rural property
*This article was developed with AI-powered tools and has been carefully reviewed by our editors.